Construction Page
General Benchwork Design
This is a look at the start of the the benchwork. It shows the general design of 1x4 std lumber attached to 2x4 studs, supporting 1/2 plywood.
More Benchwork
Continuing on down this wall. The Horizontal 1x4 is being used to establish the height and keep all the supports installed the same.
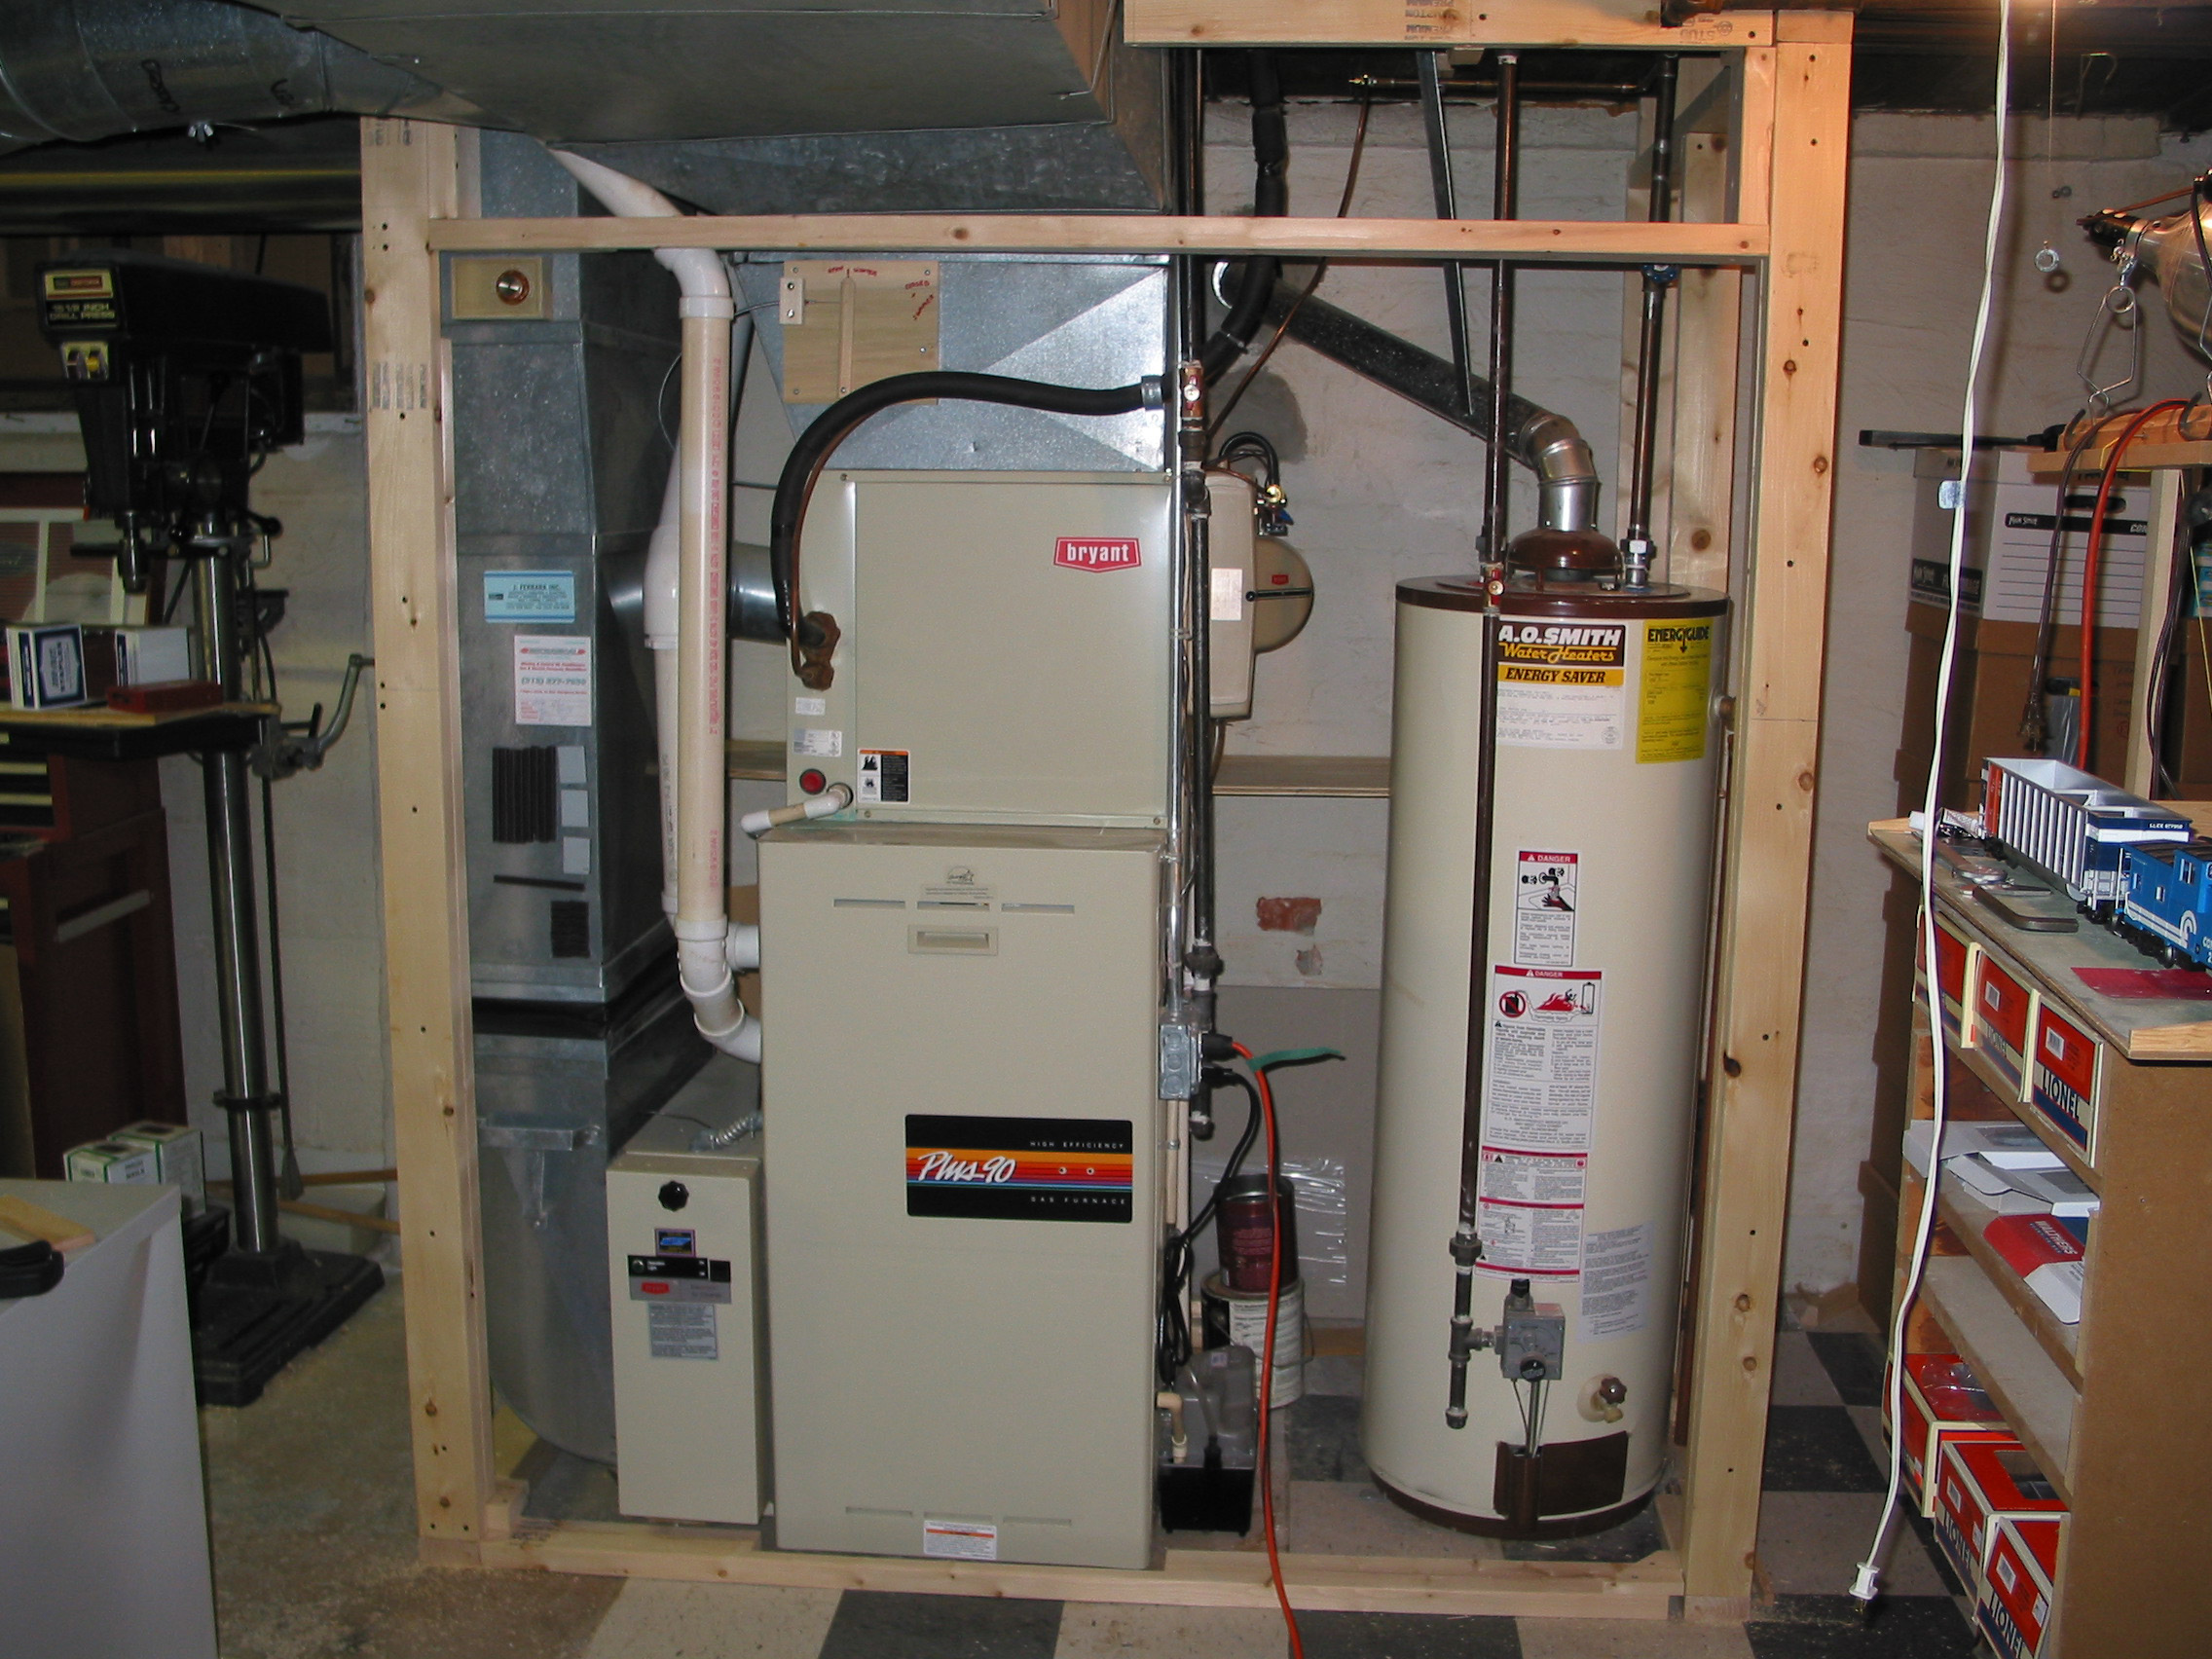
Roughing In
This photo shows roughing in the furnace area. This area will be drywalled with a front opening double door for furnace access.
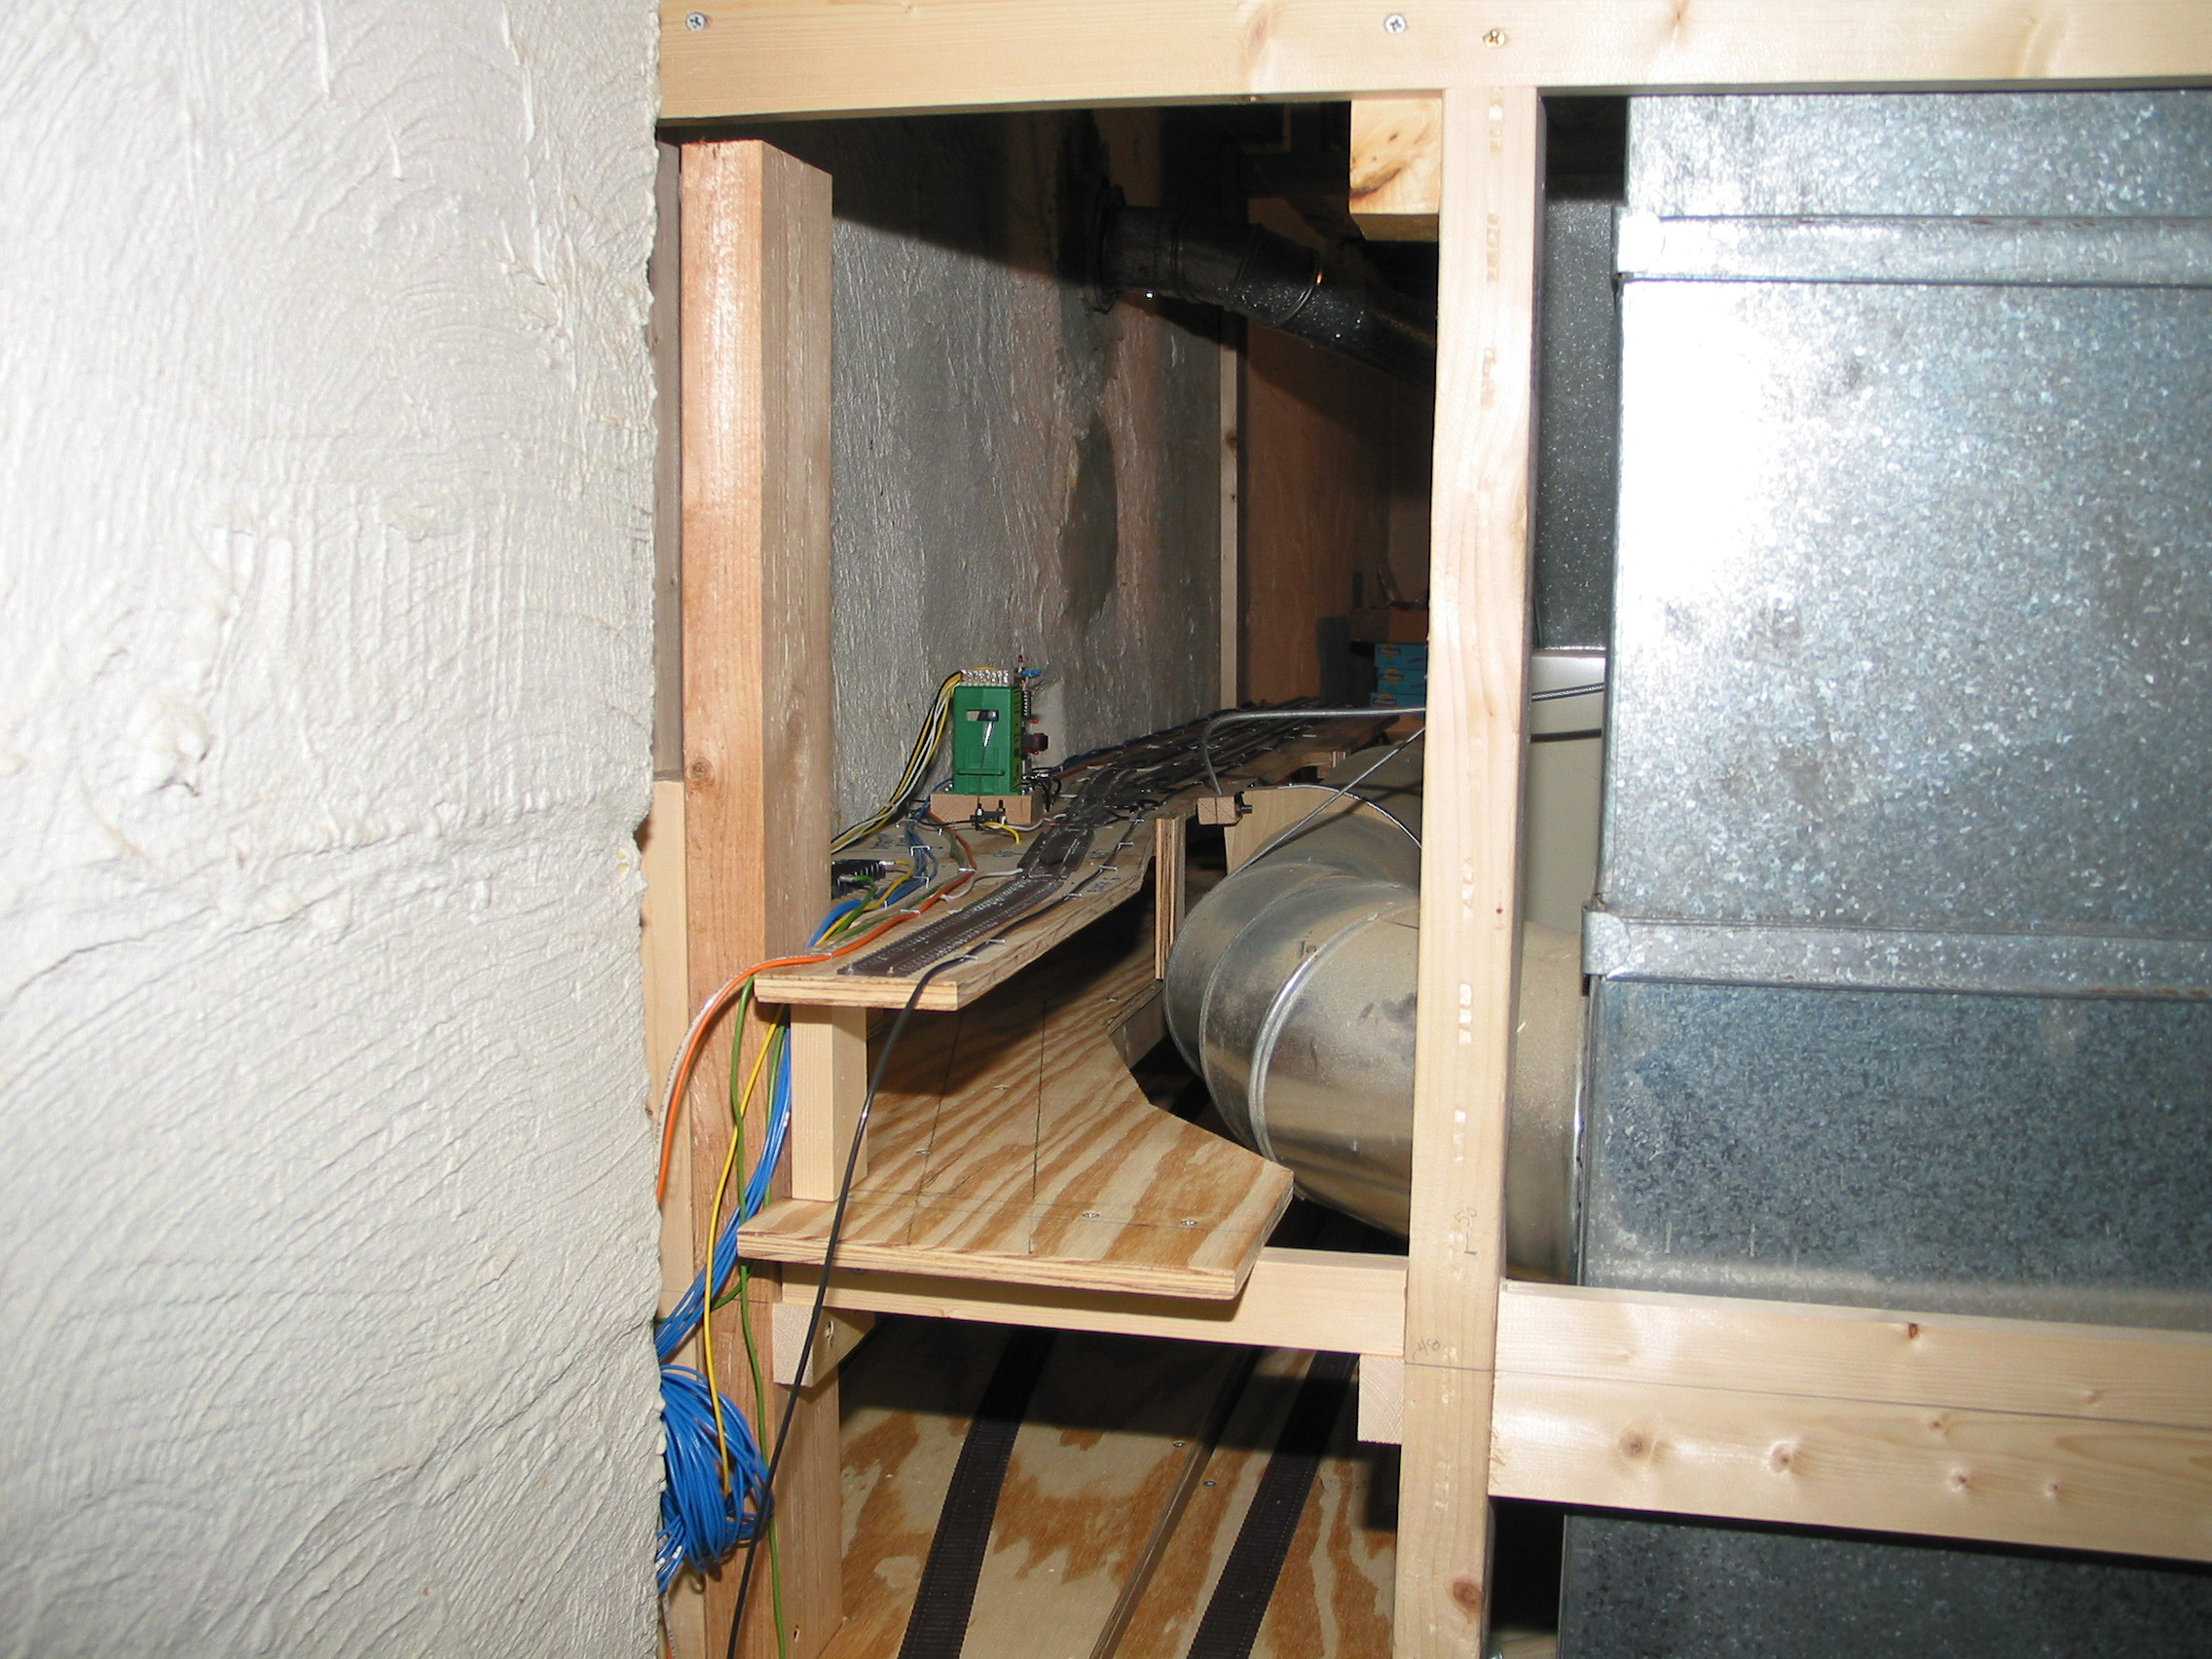
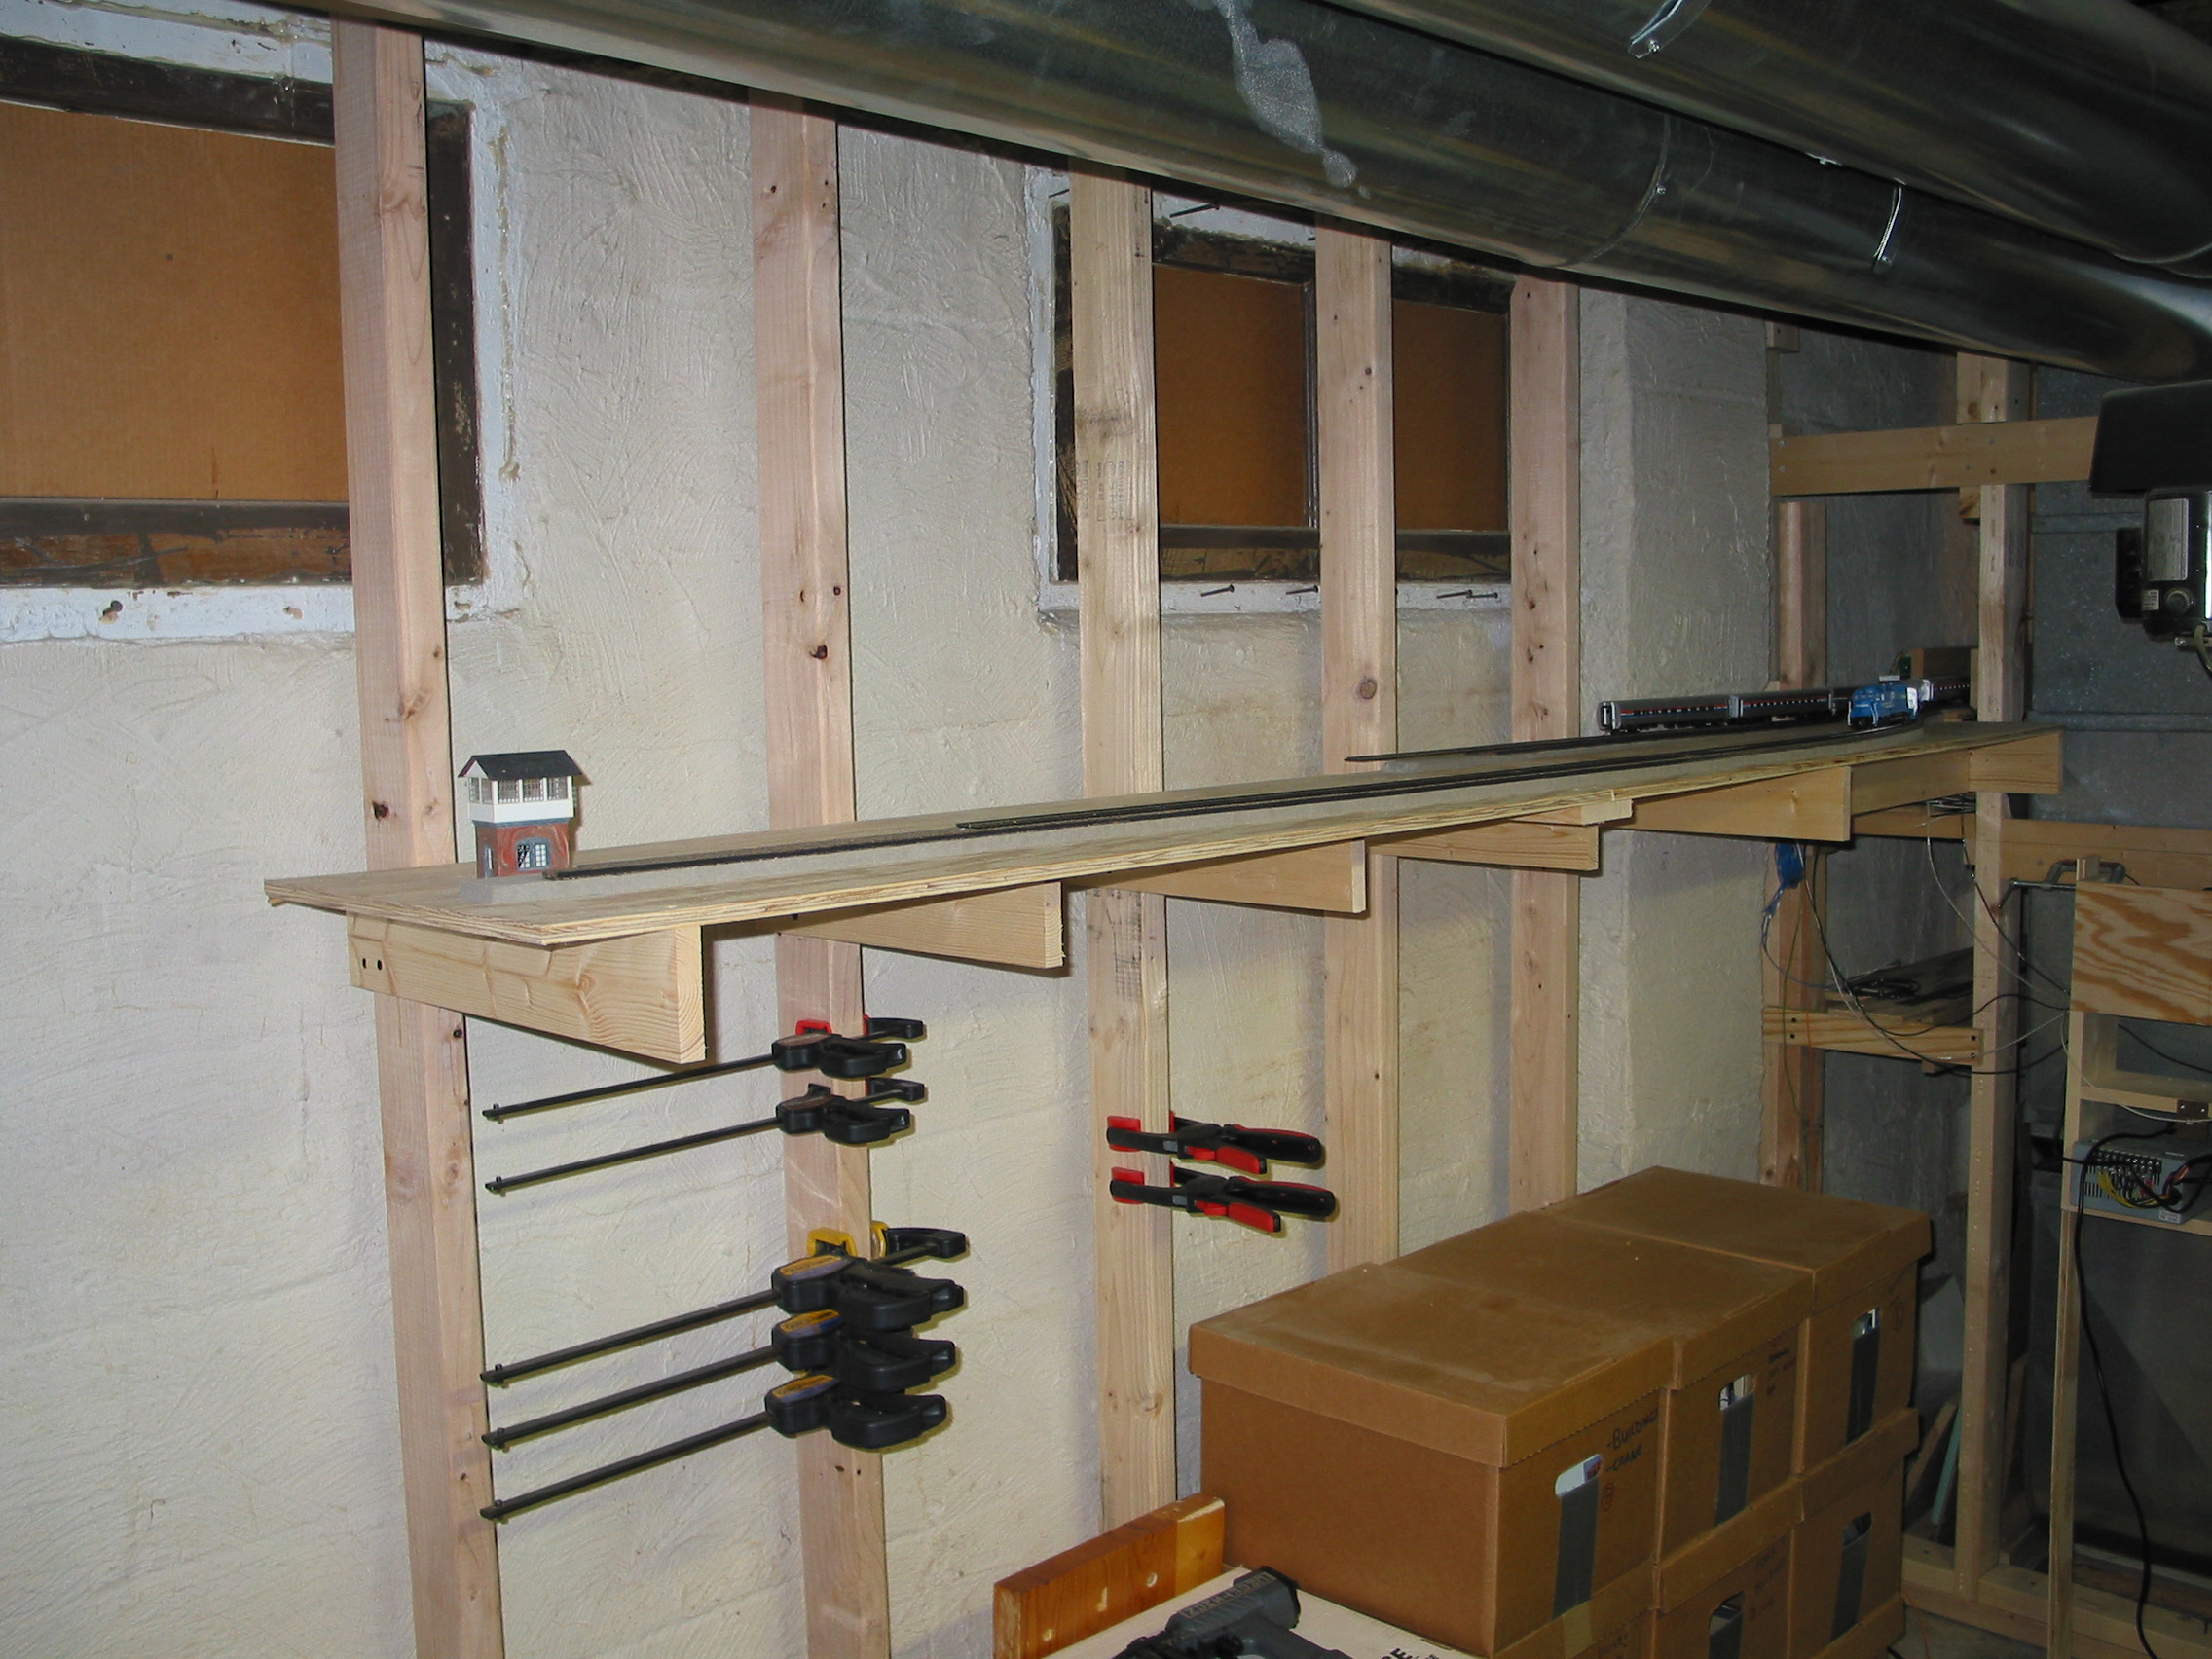
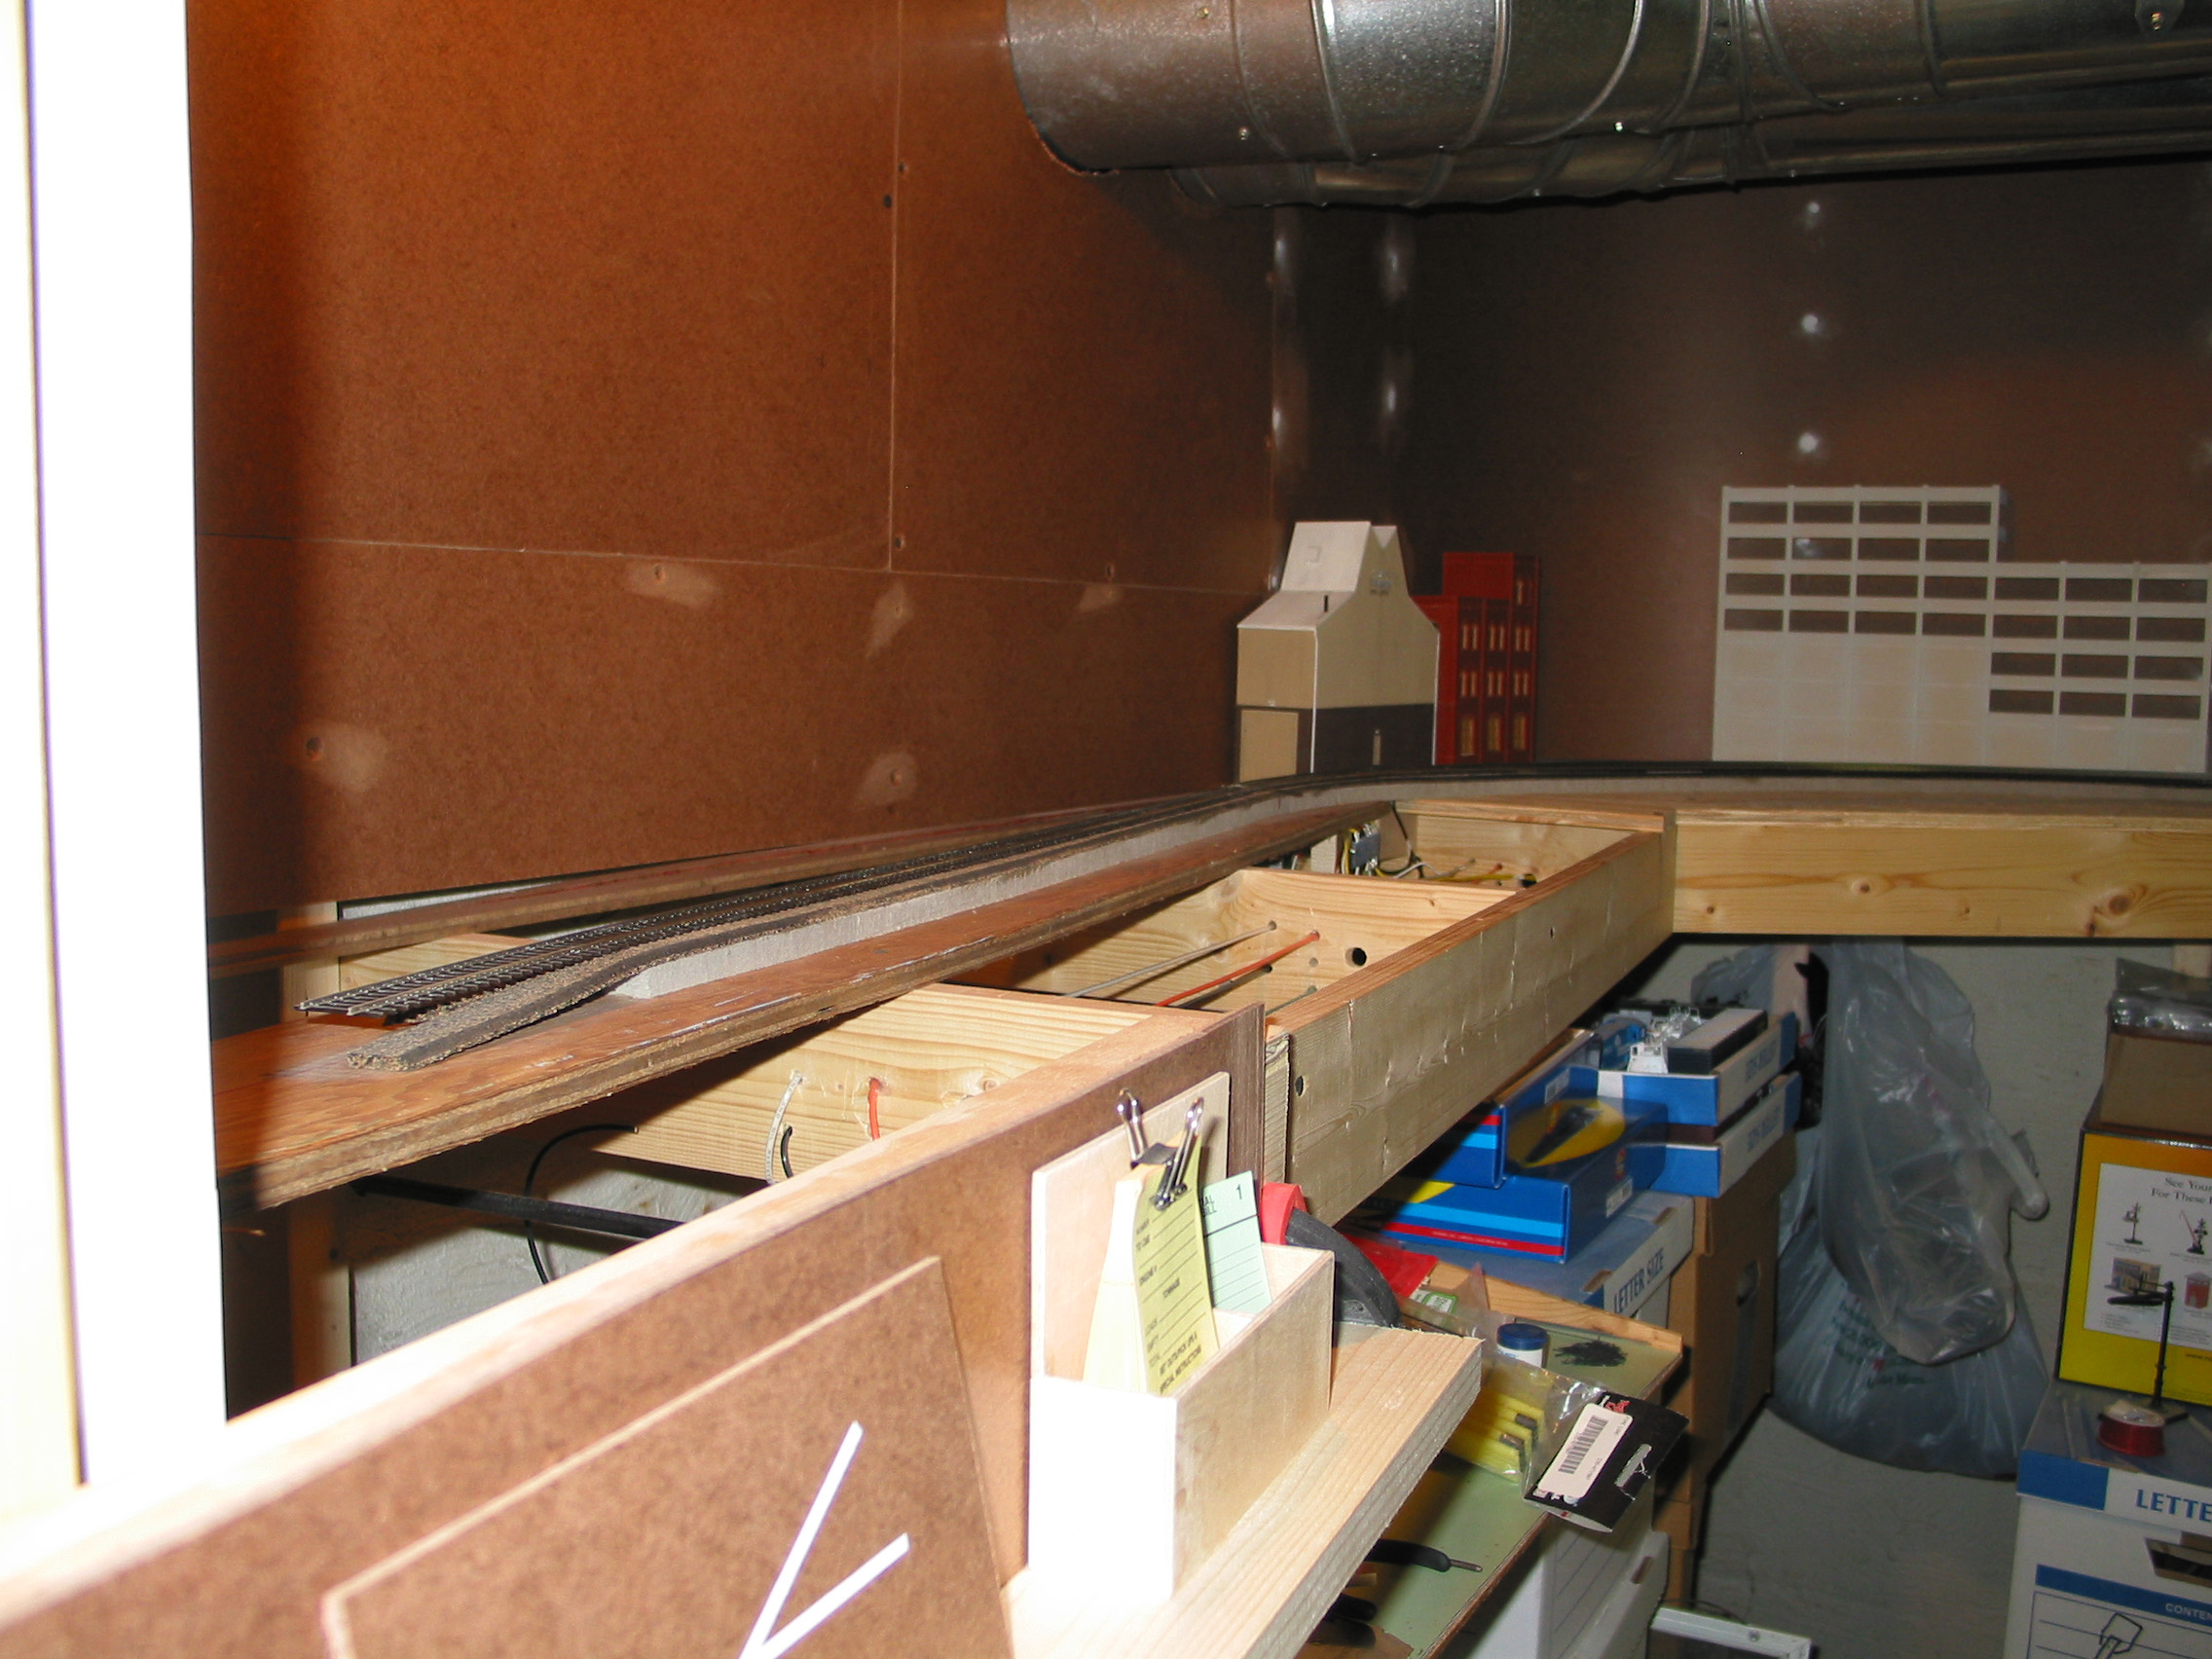
Trackage Behind Furnace
This photo shows the trackage that goes behind the furnace. The Tortoise switch machine controls a 2 track hidden siding. The second level is the main line, with the lowest level being the hidden staging.
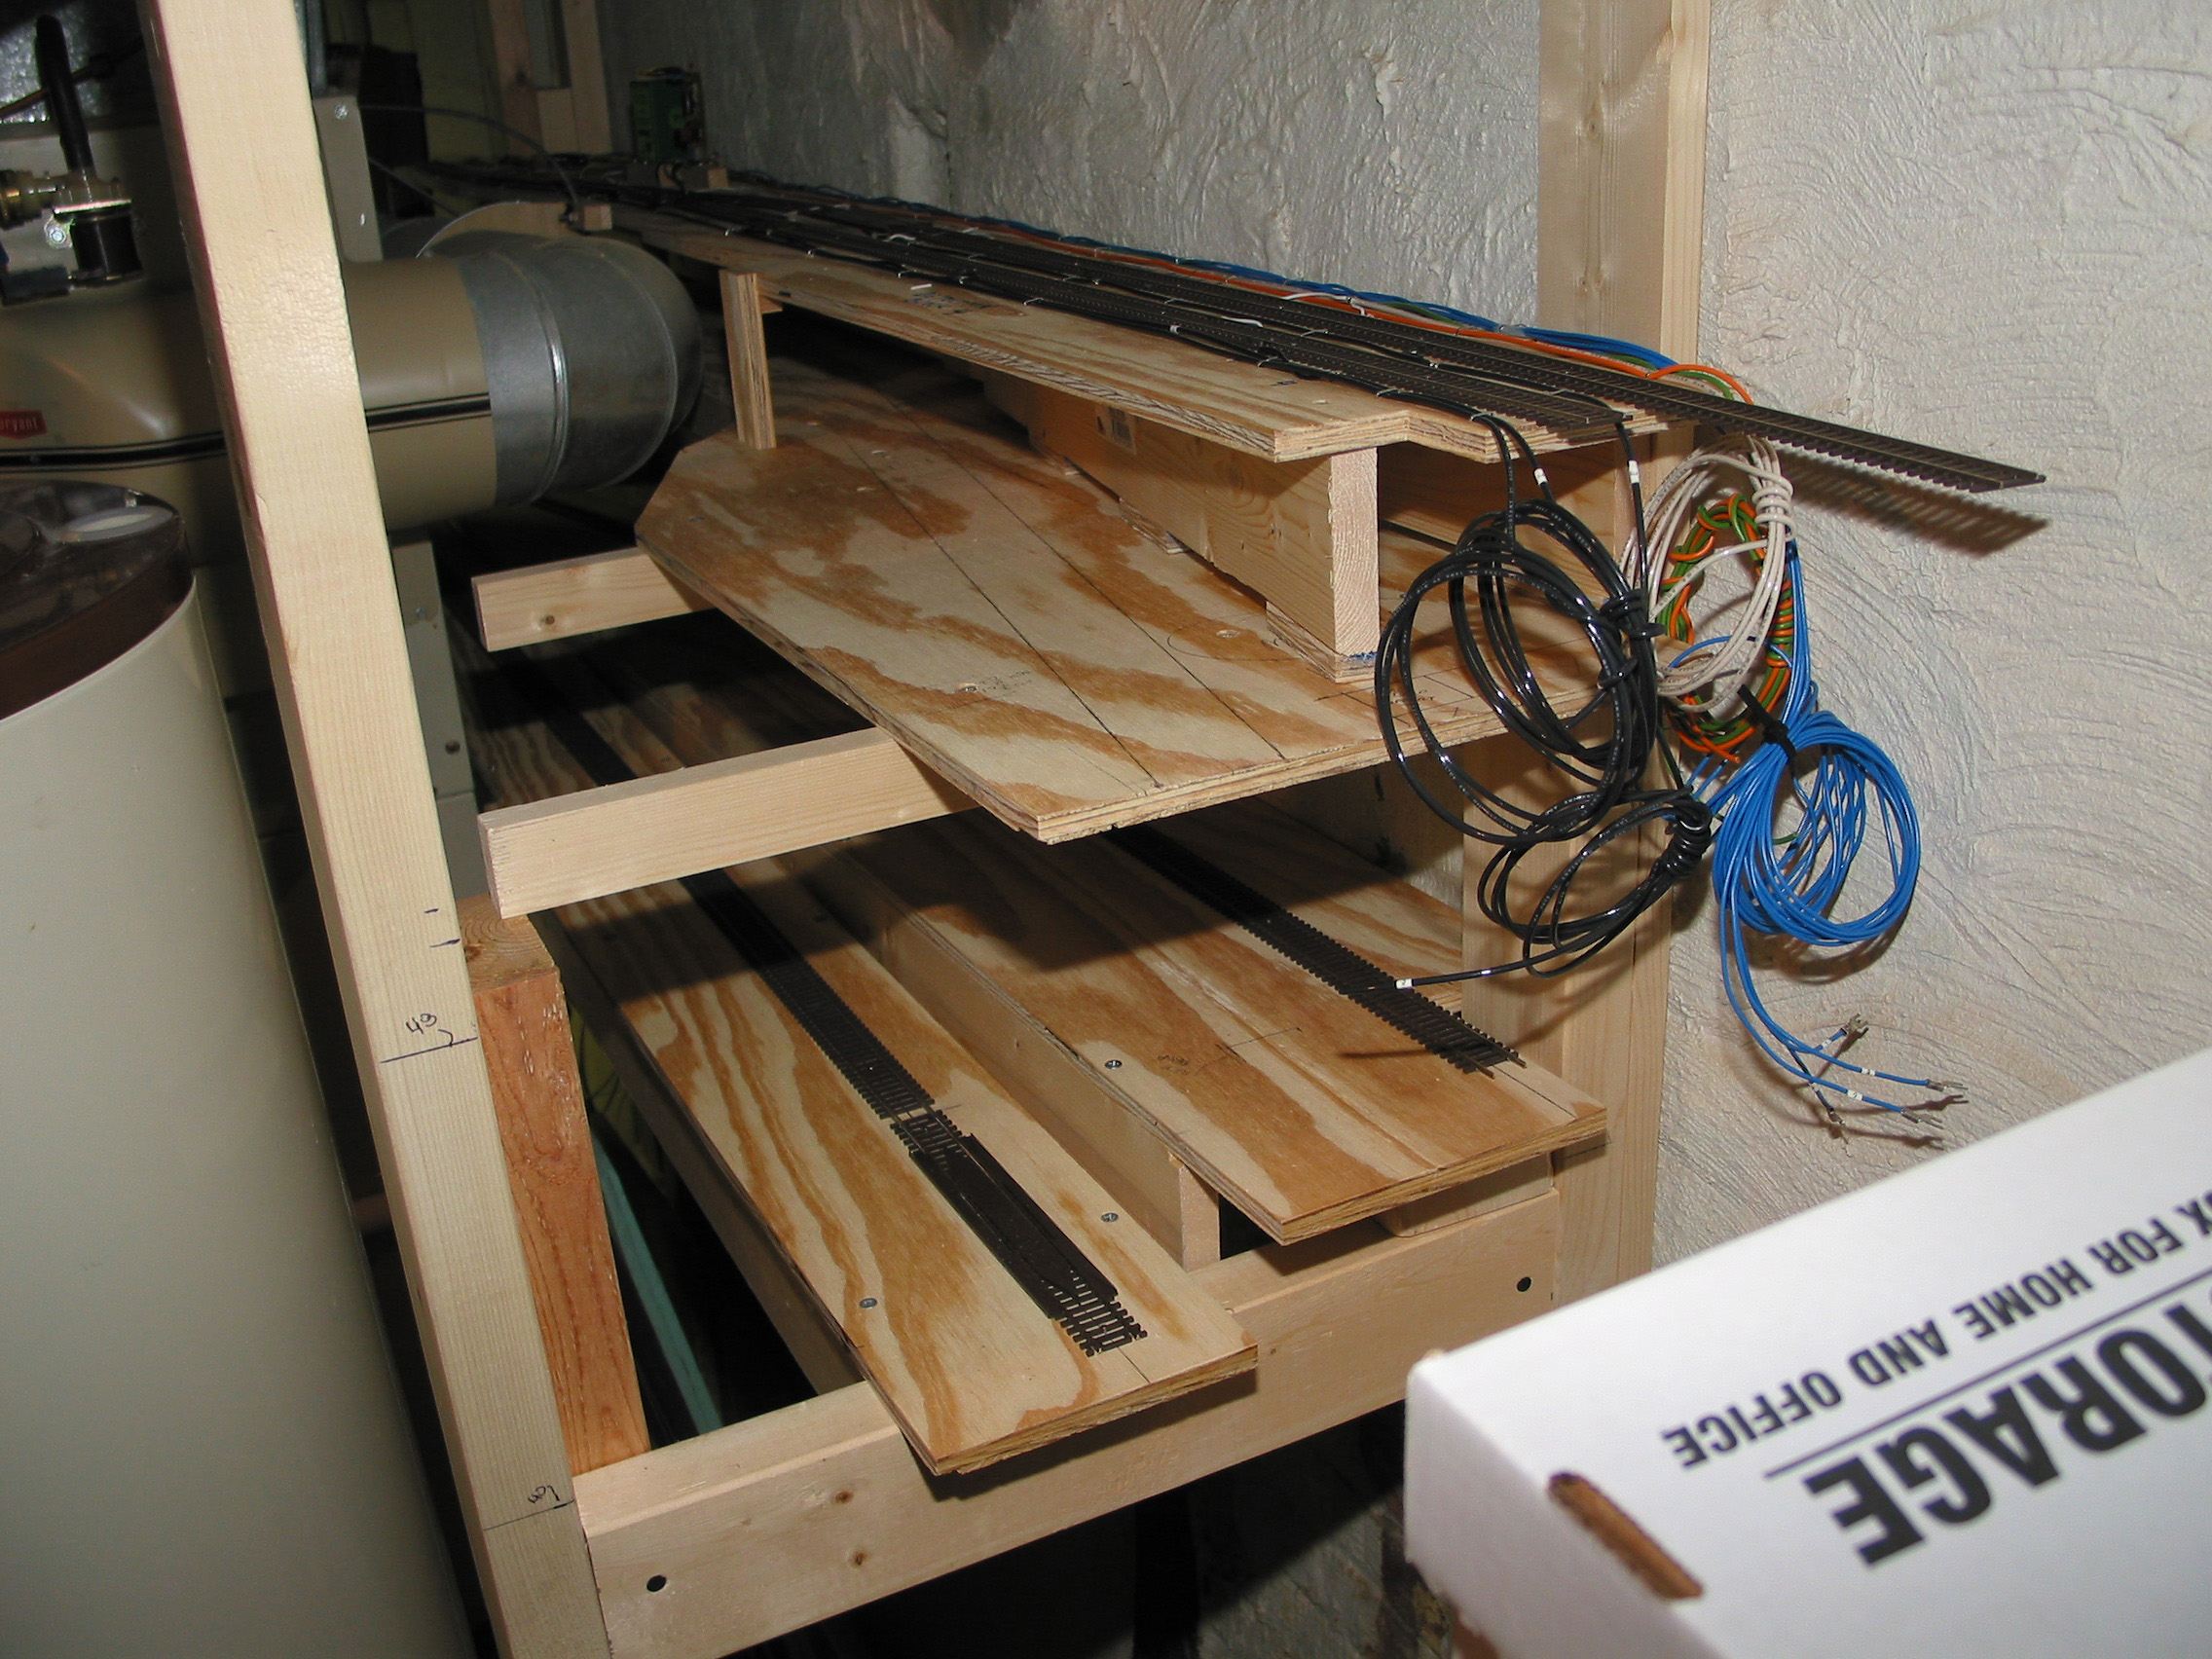
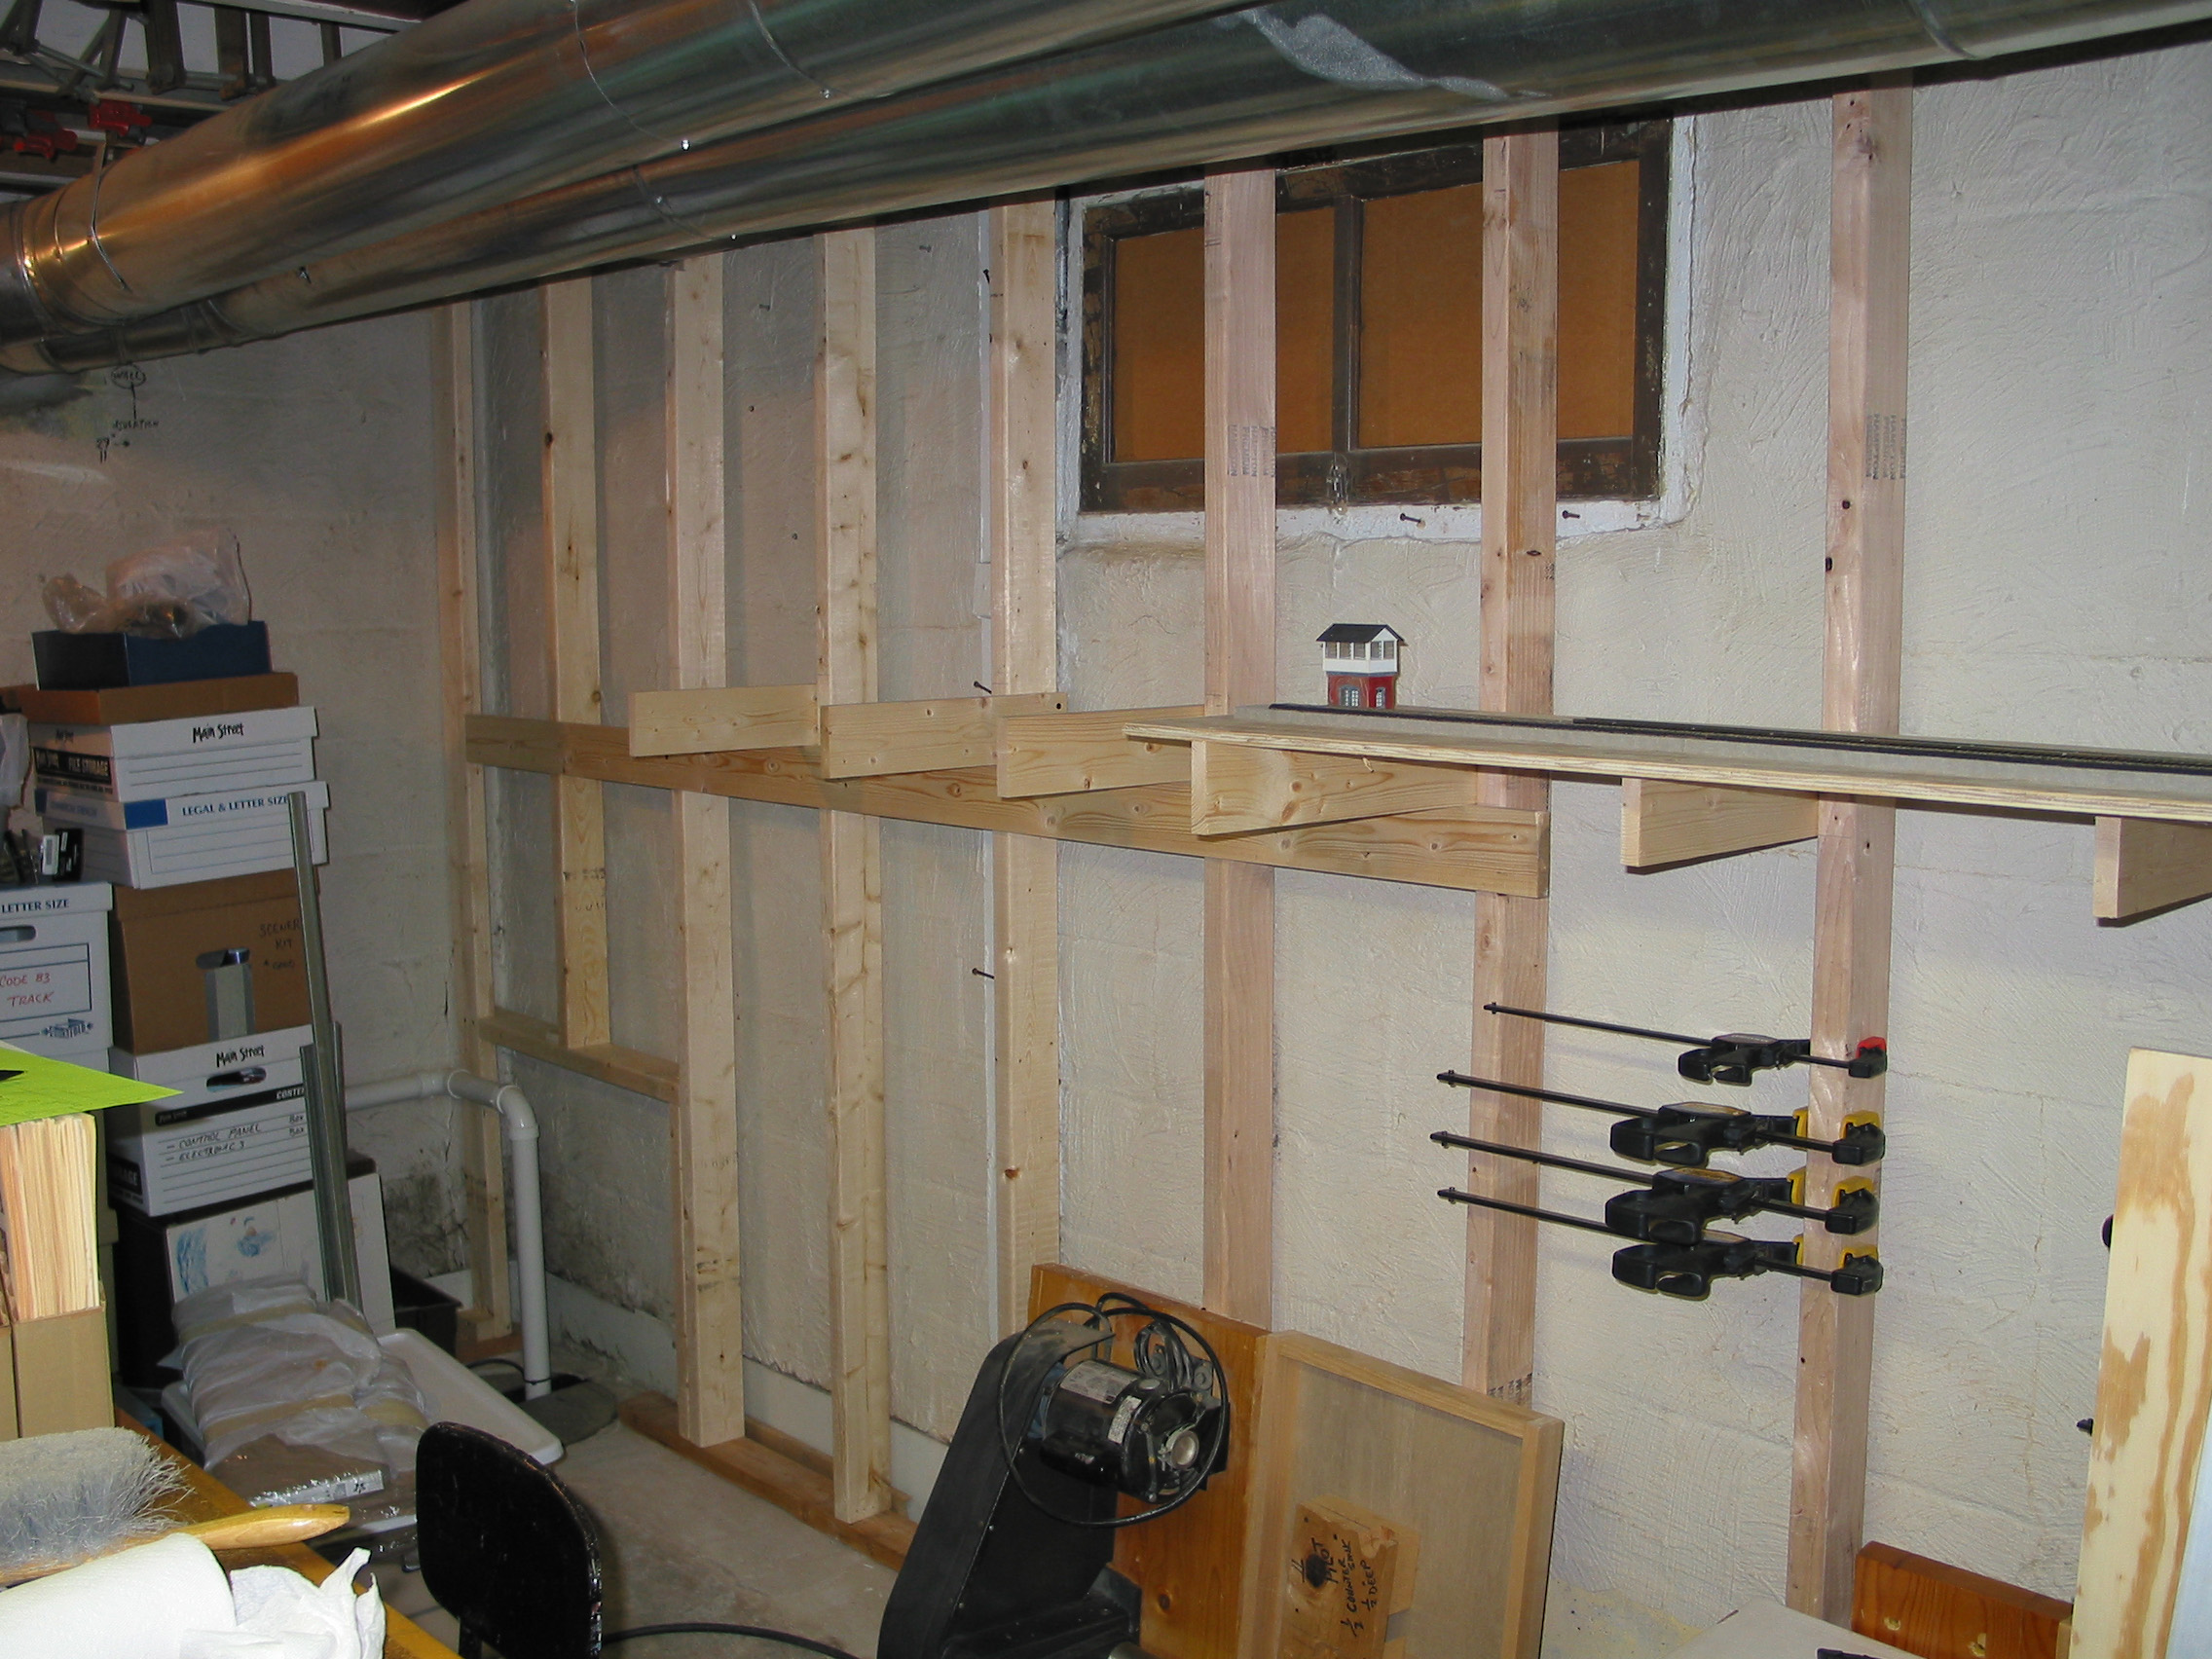
More Trackage Behind Furnace
This photo shows the other side of the trackage that goes behind the furnace. The track is pre-wired, tested and then installed.
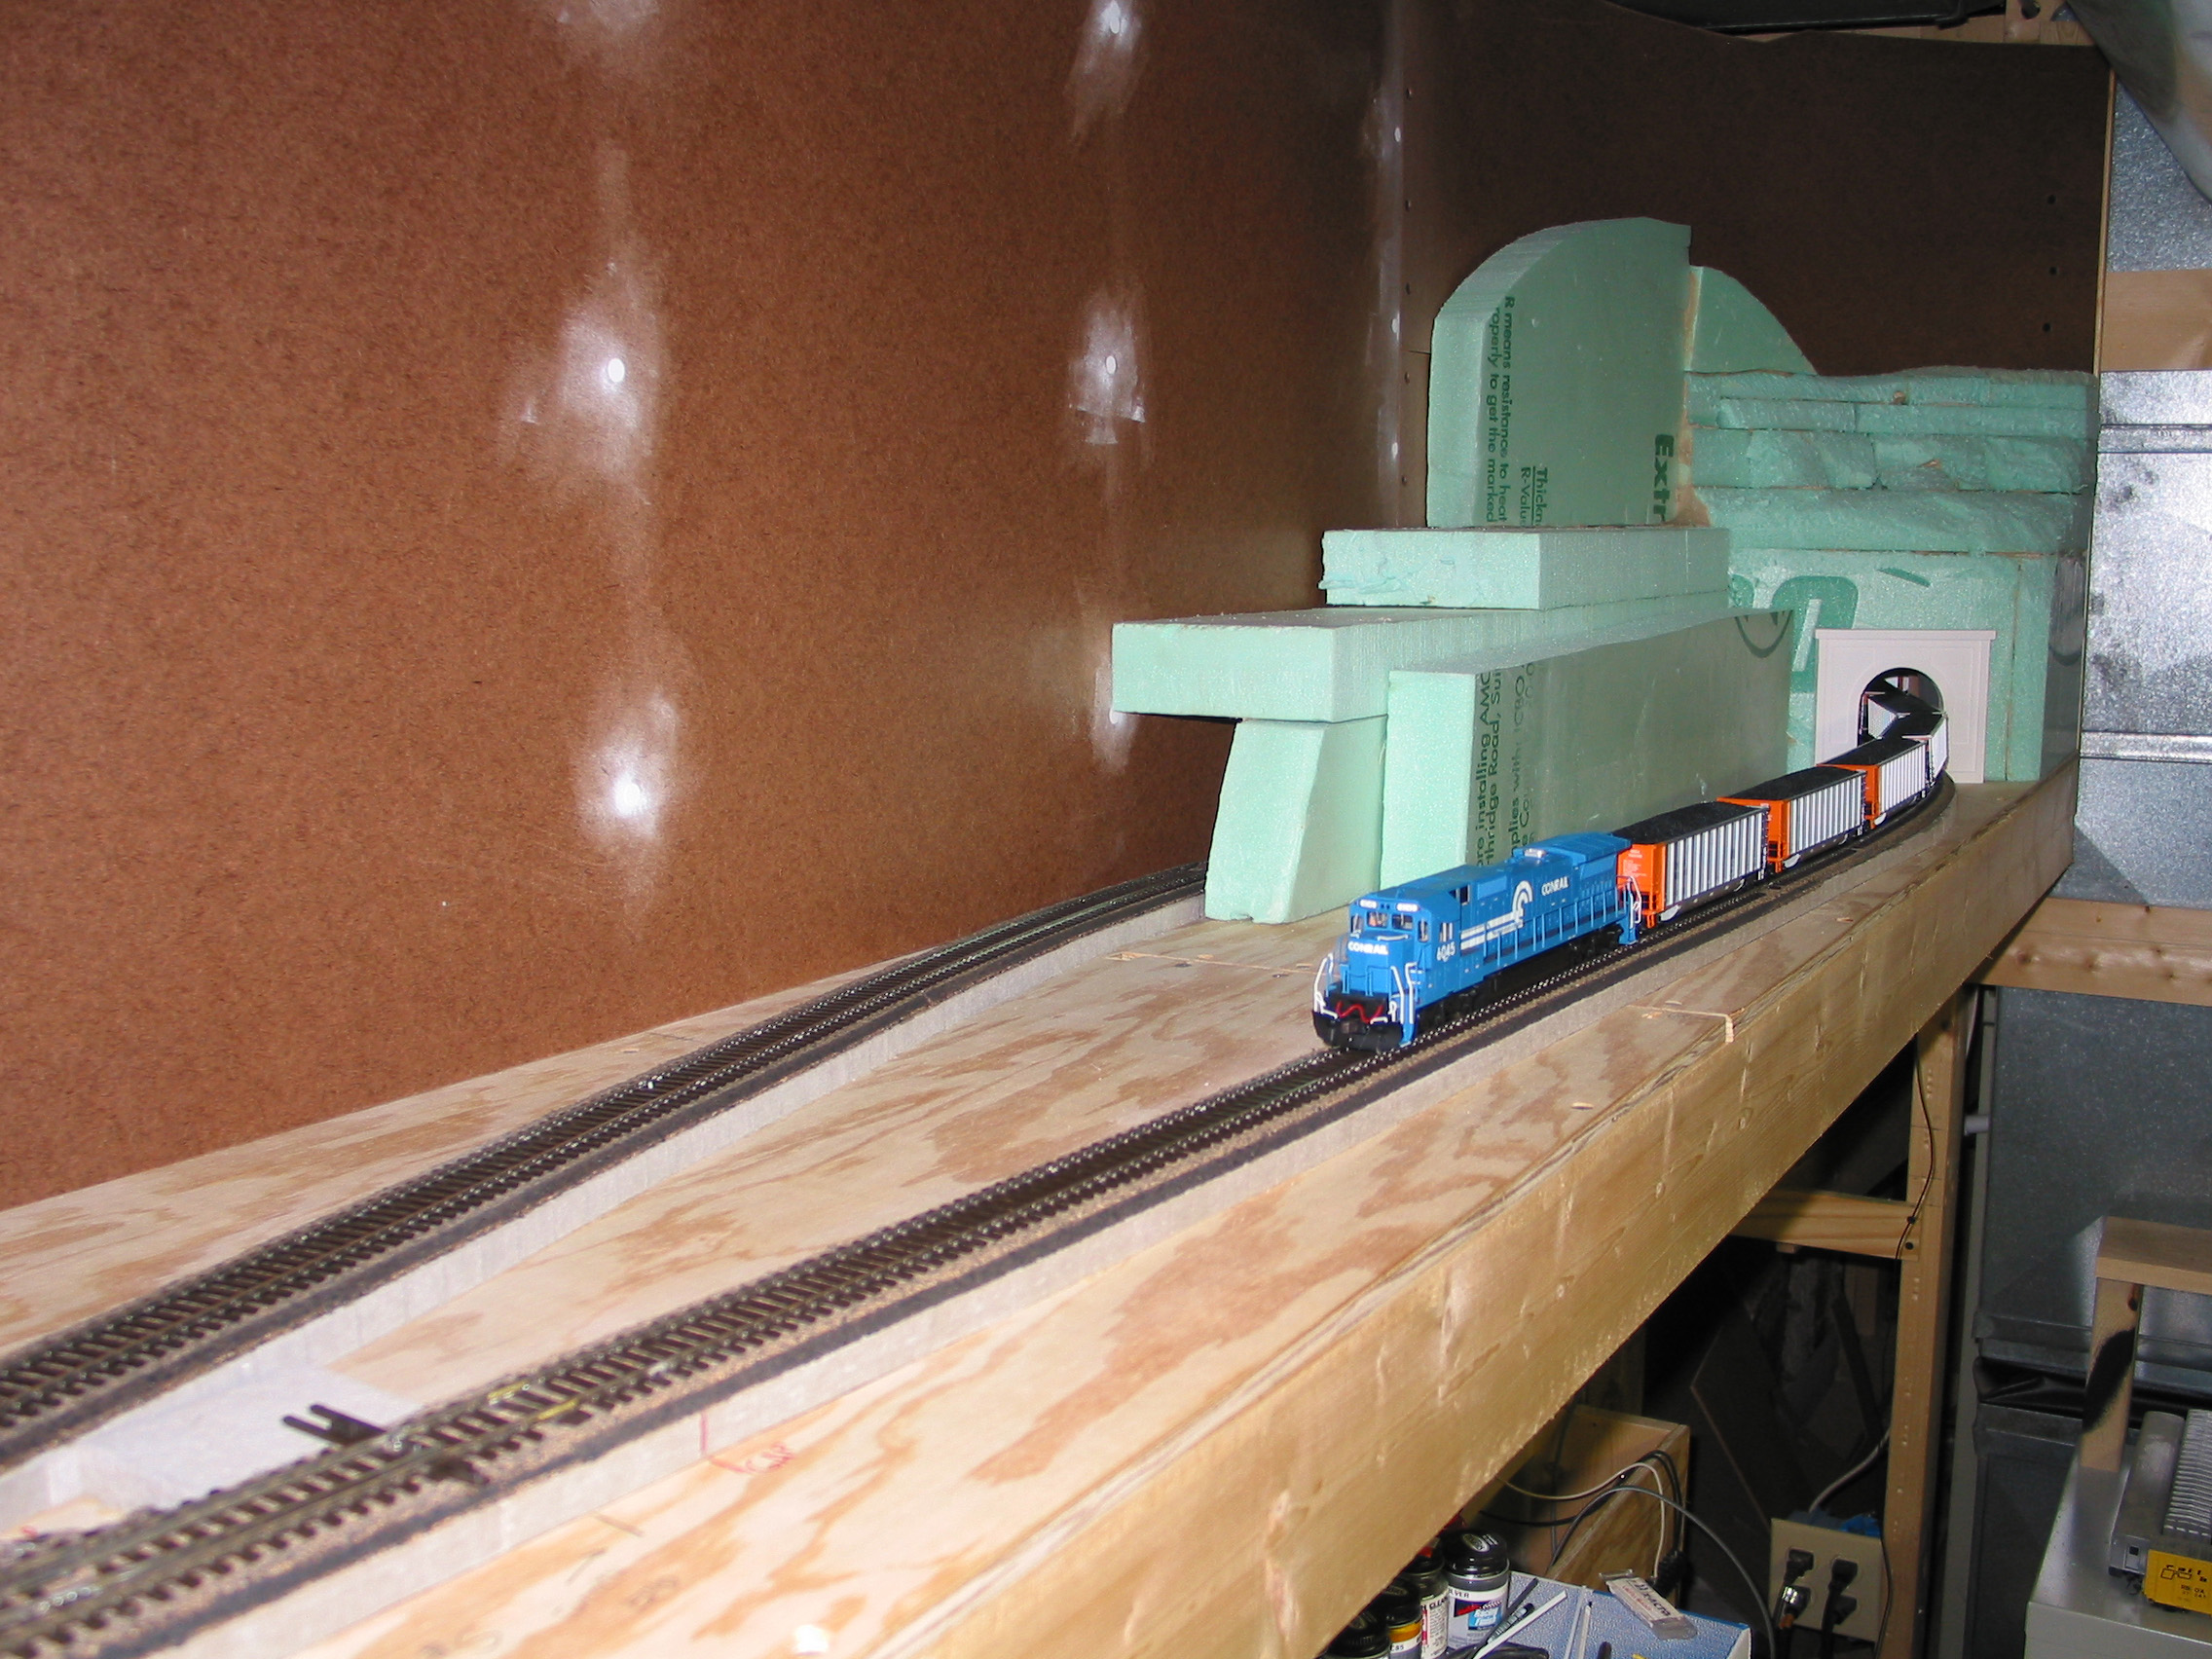
Backdrop Added
This photo shows part of the mainline with the backdrop added. You can see the start of the tunnel portal, using green construction foam glued together with Liquid Nails. Mainline is on the right, with the Interchange track going left where there are 2 tracks of hidden siding.
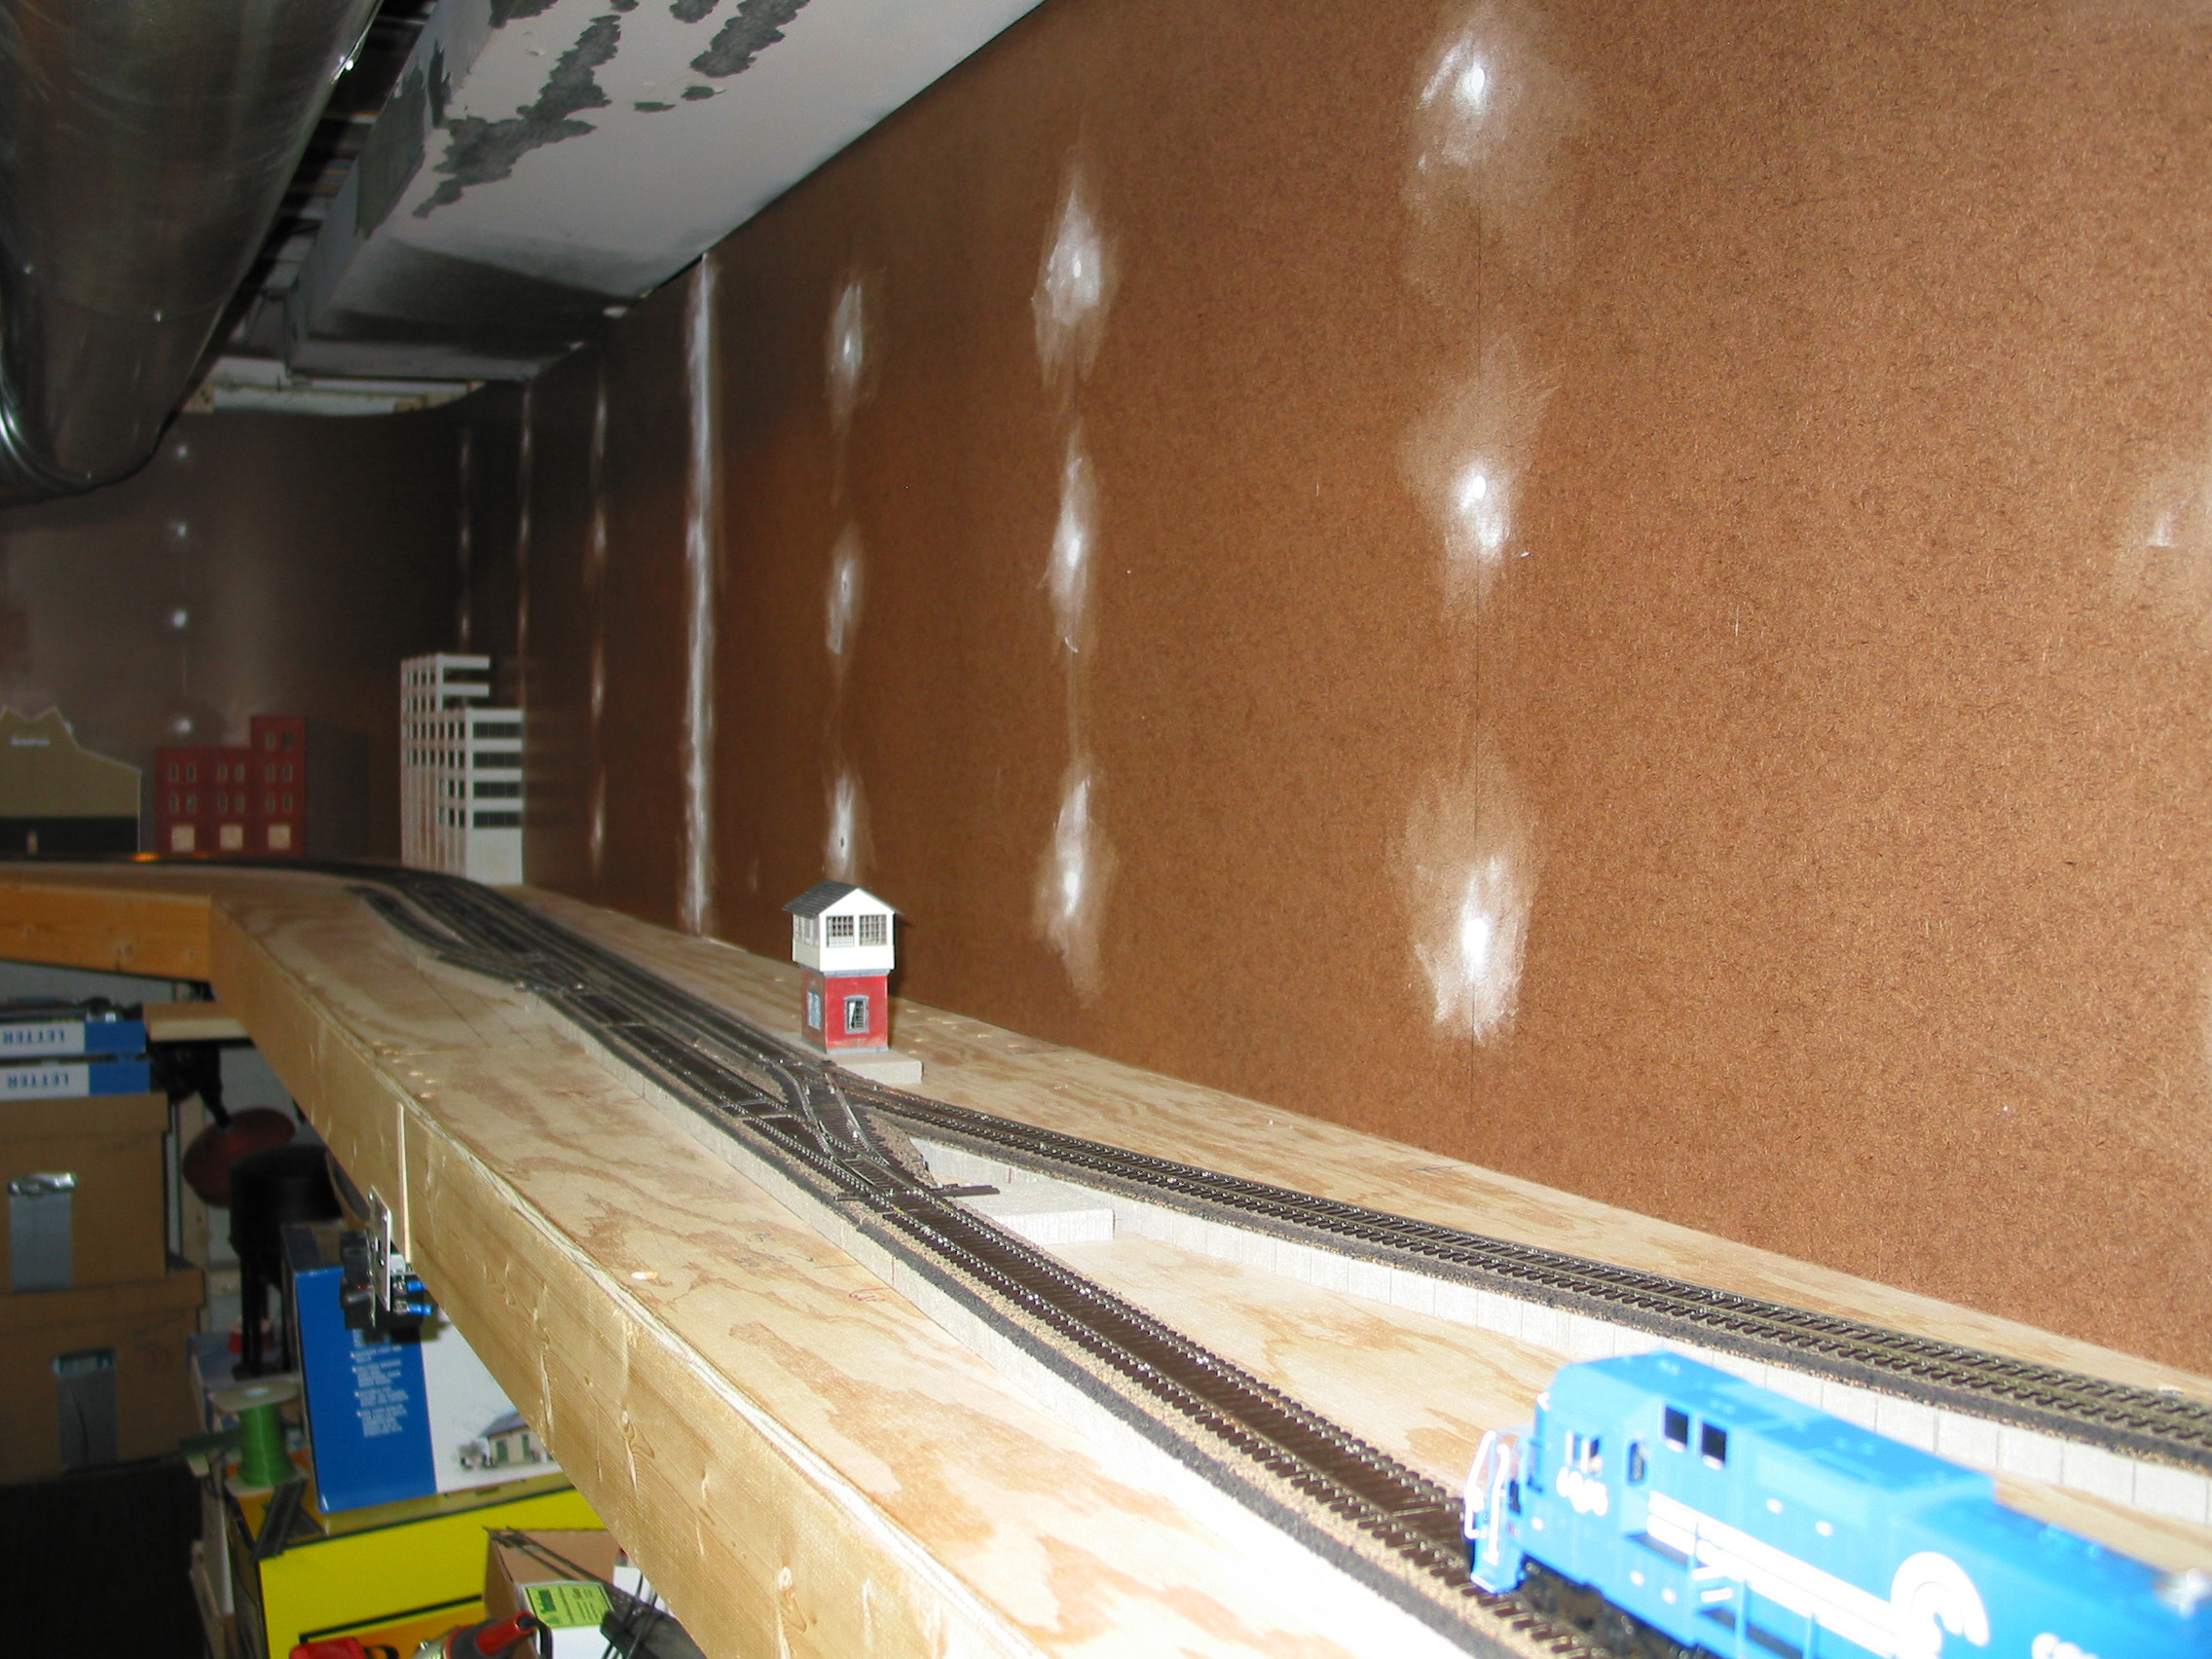
Moving West
Moving Westward, we get an idea of the what the mainline looks like. Shown is the Interlocking tower, similar to AR Tower. Forward and to the left, there is a small siding for interchange and a long passing siding on the right. Roadbed is HO cork over 1/2 inch homasote. The homasote is cut into 1 inch wide strips. 2 pieces are used - 1 on each side of the track centerline, it is held down with white glue and small brads.
Around the Corner
Next the mainline rounds the corner. In the background is a coved corner. Made by bending 1/8 Masonite and securing it at the endpoints. You might be able to see the removable panel on the upper left, this is for access to the crawl space. A mock up of the facia and a car card box is visible too.
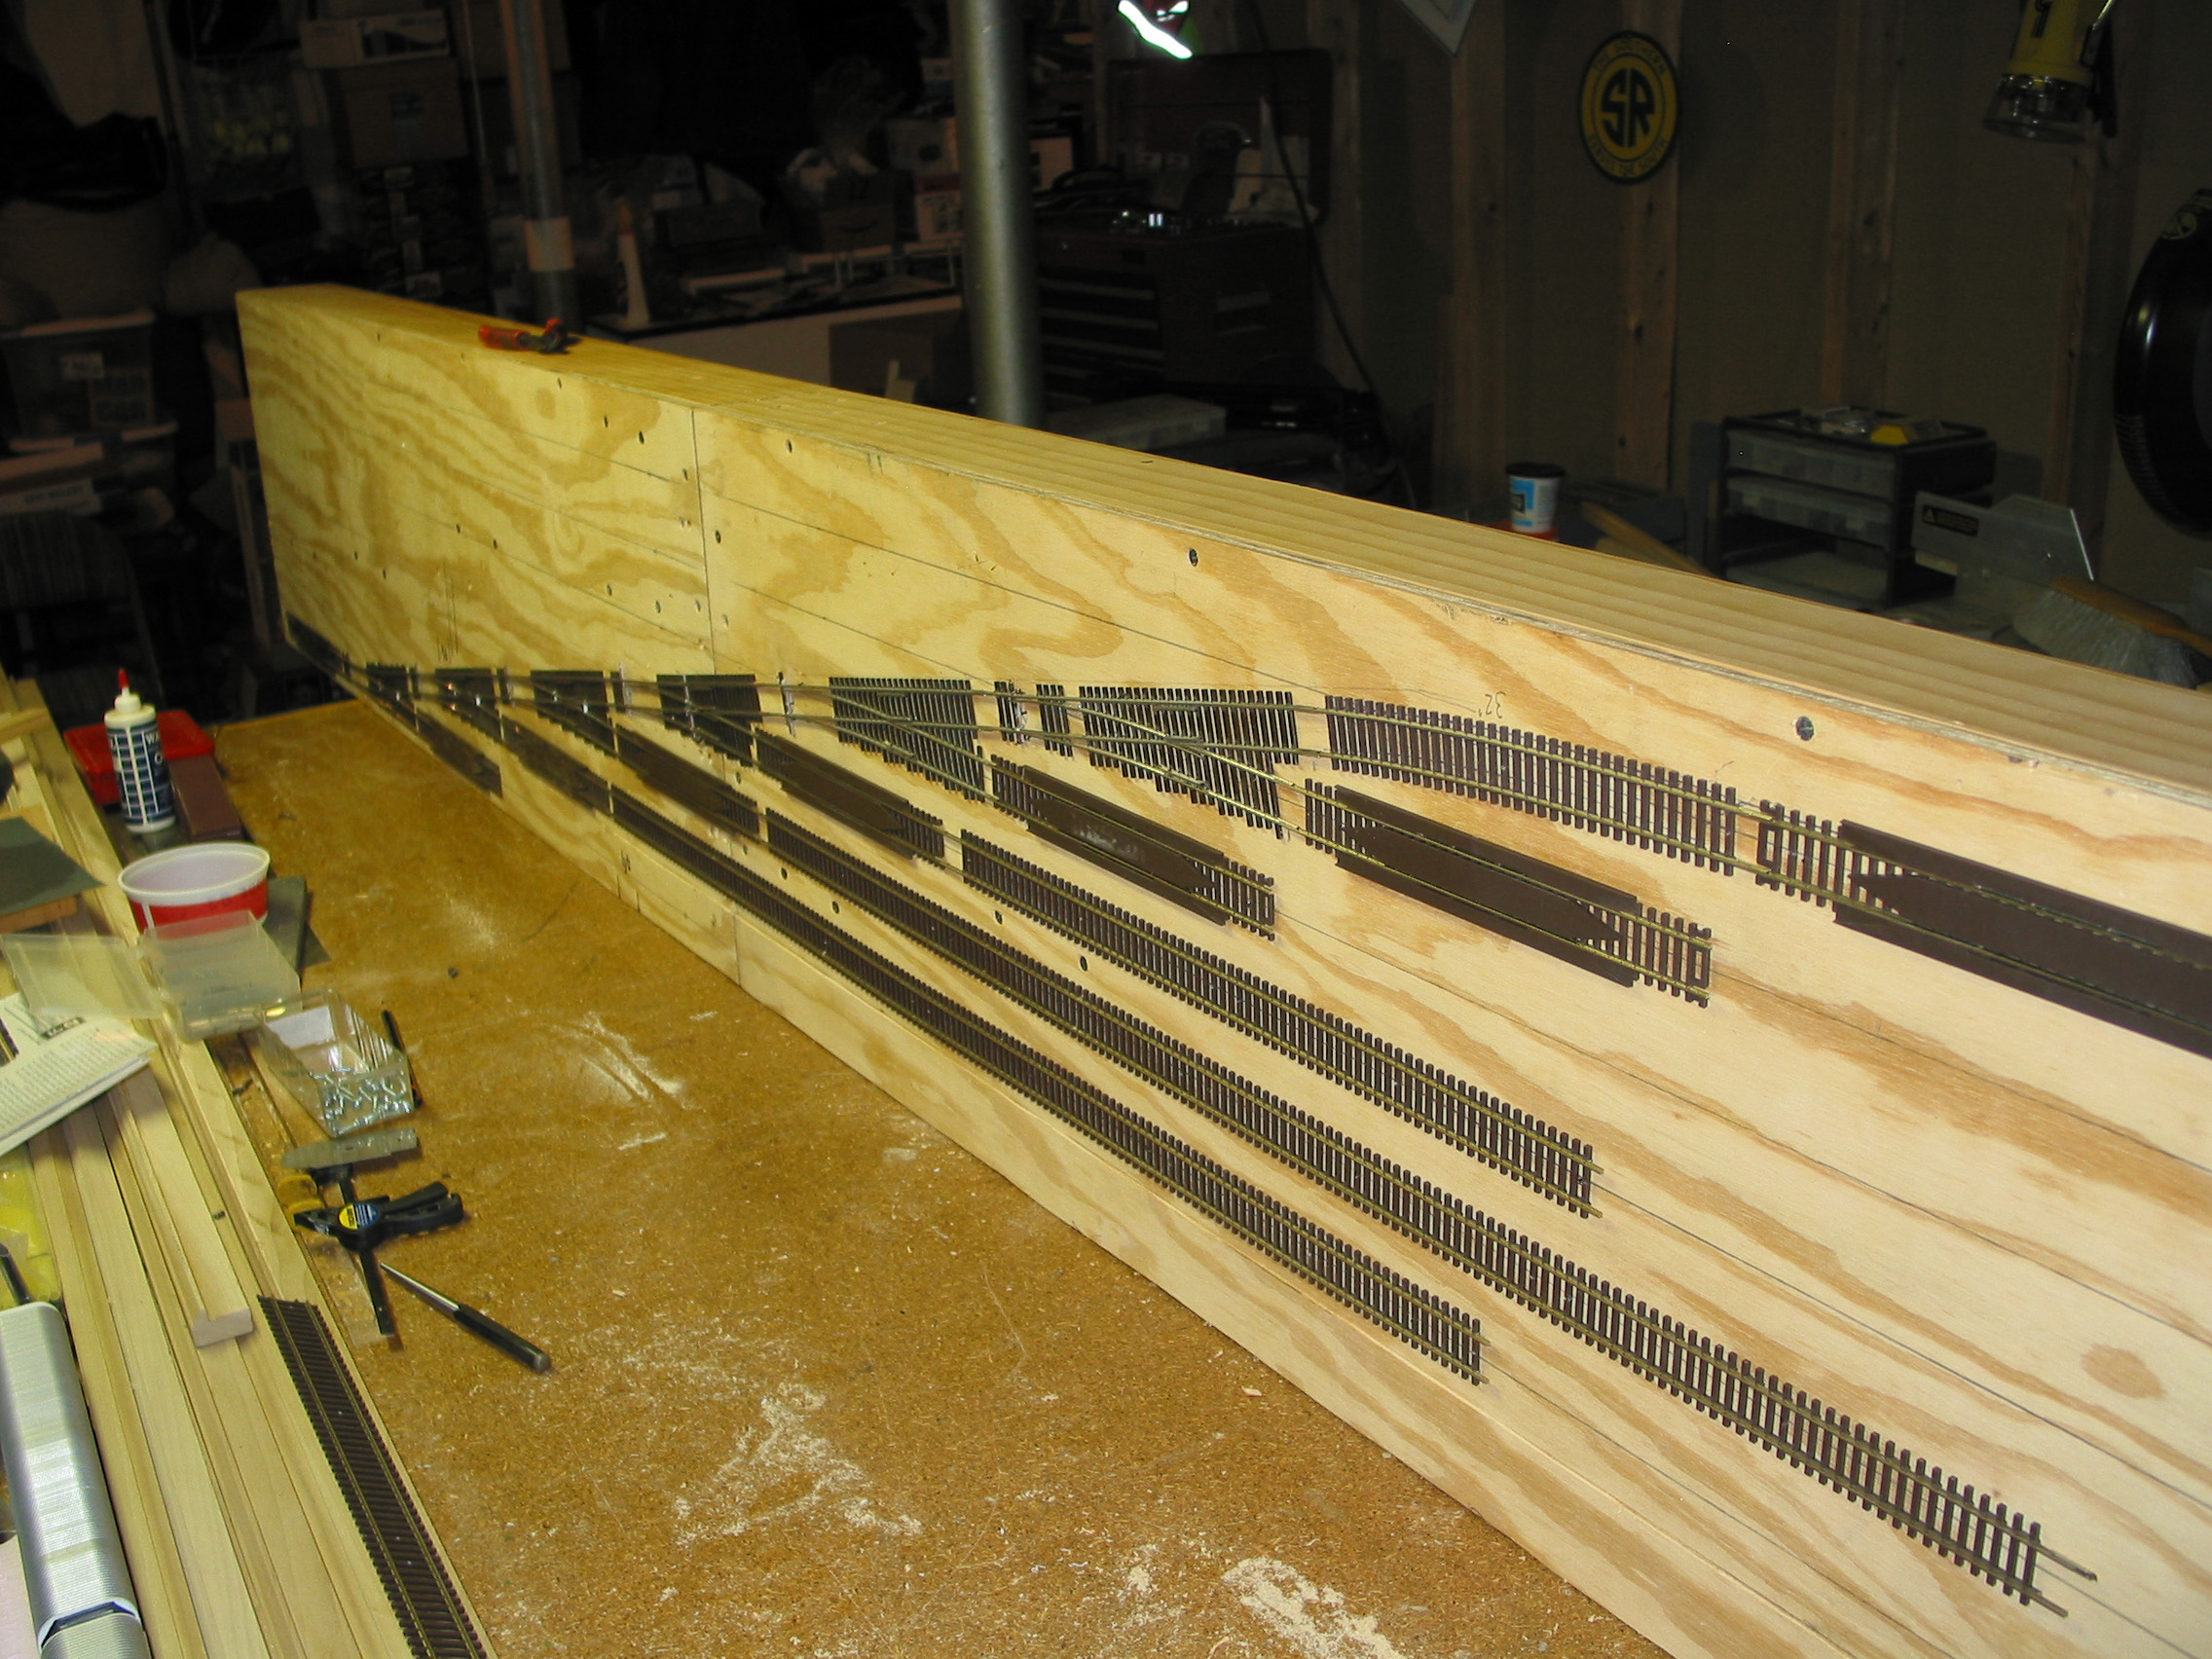
Staging Yard
Staging yard was assembled on the bench to ease in the construction. Atlas re-railers are used a both ends (even the Stub ends). Staging tracks have occupancy detection on the body of the track and on a 12" end section. LED indicators will display the location of the train - if you are fouling the switch or are at the end of the siding.
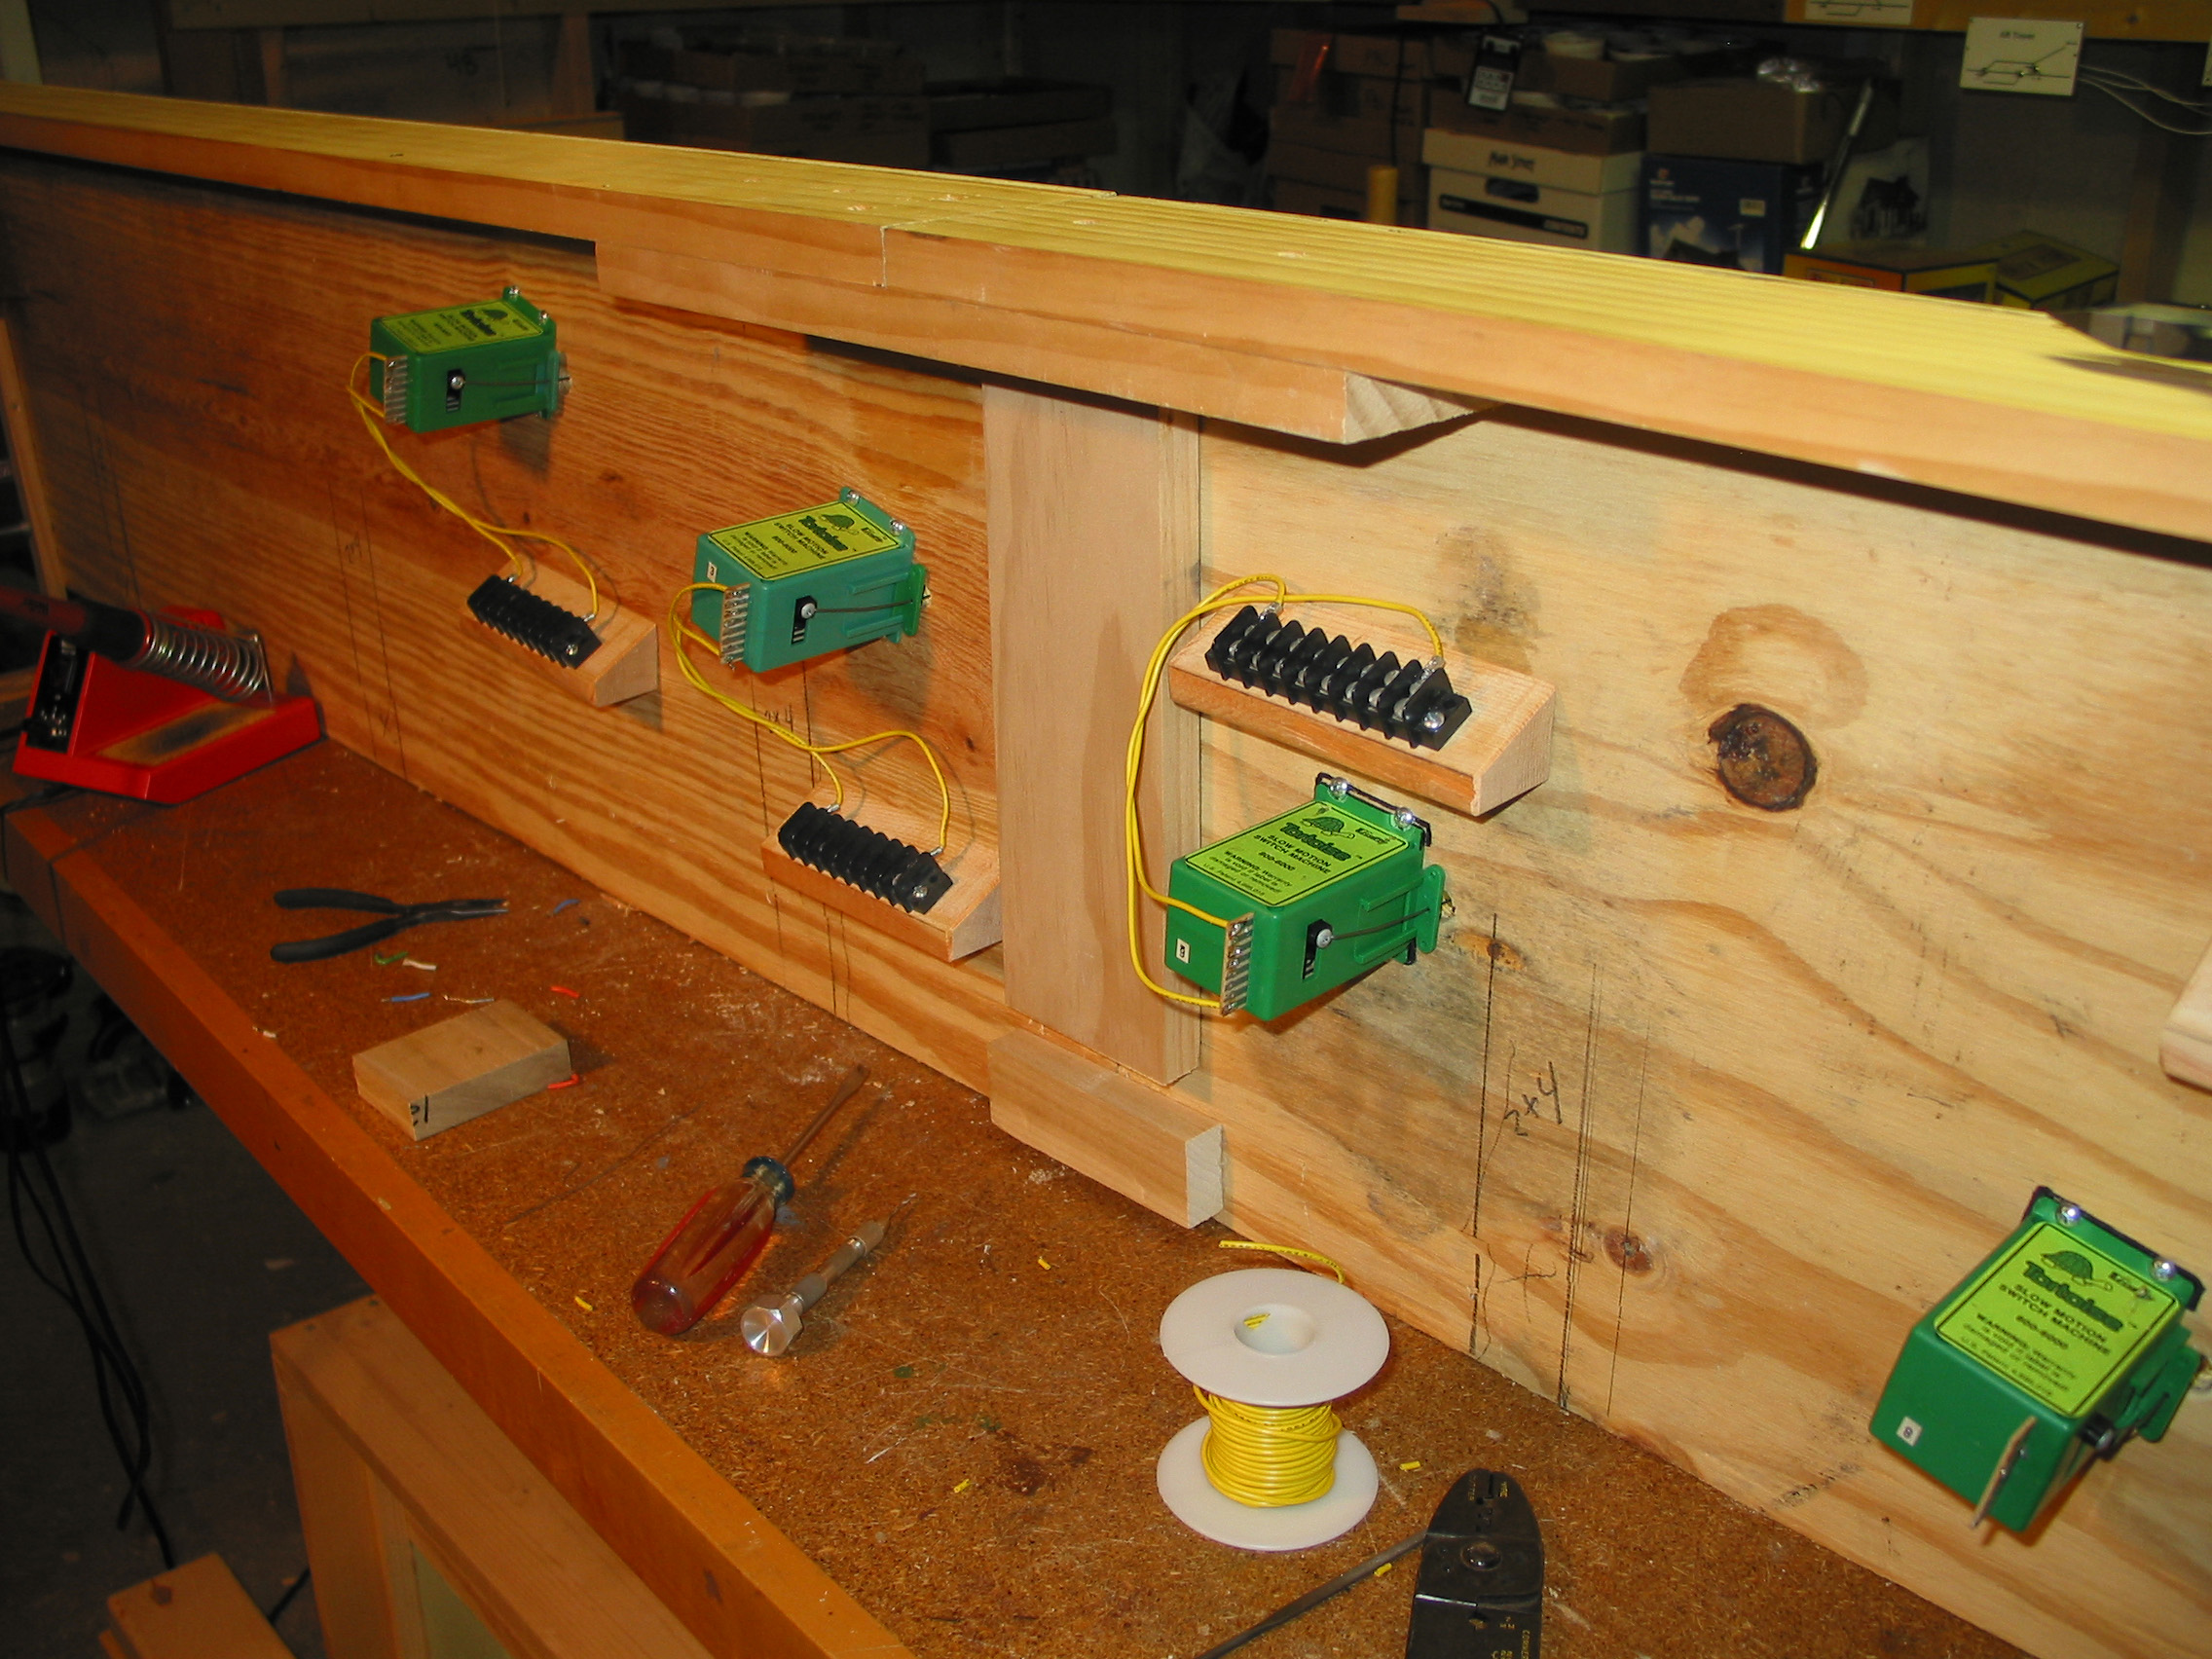
Staging Yard - Bottom View
Staging yard as viewed from the bottom - showing the switch machines and wiring. Tortoise switch machines are wired using terminal blocks, this allows easy changes and helps diagnose problems. Angled mounting blocks allow for easy access to the screws from the underside.
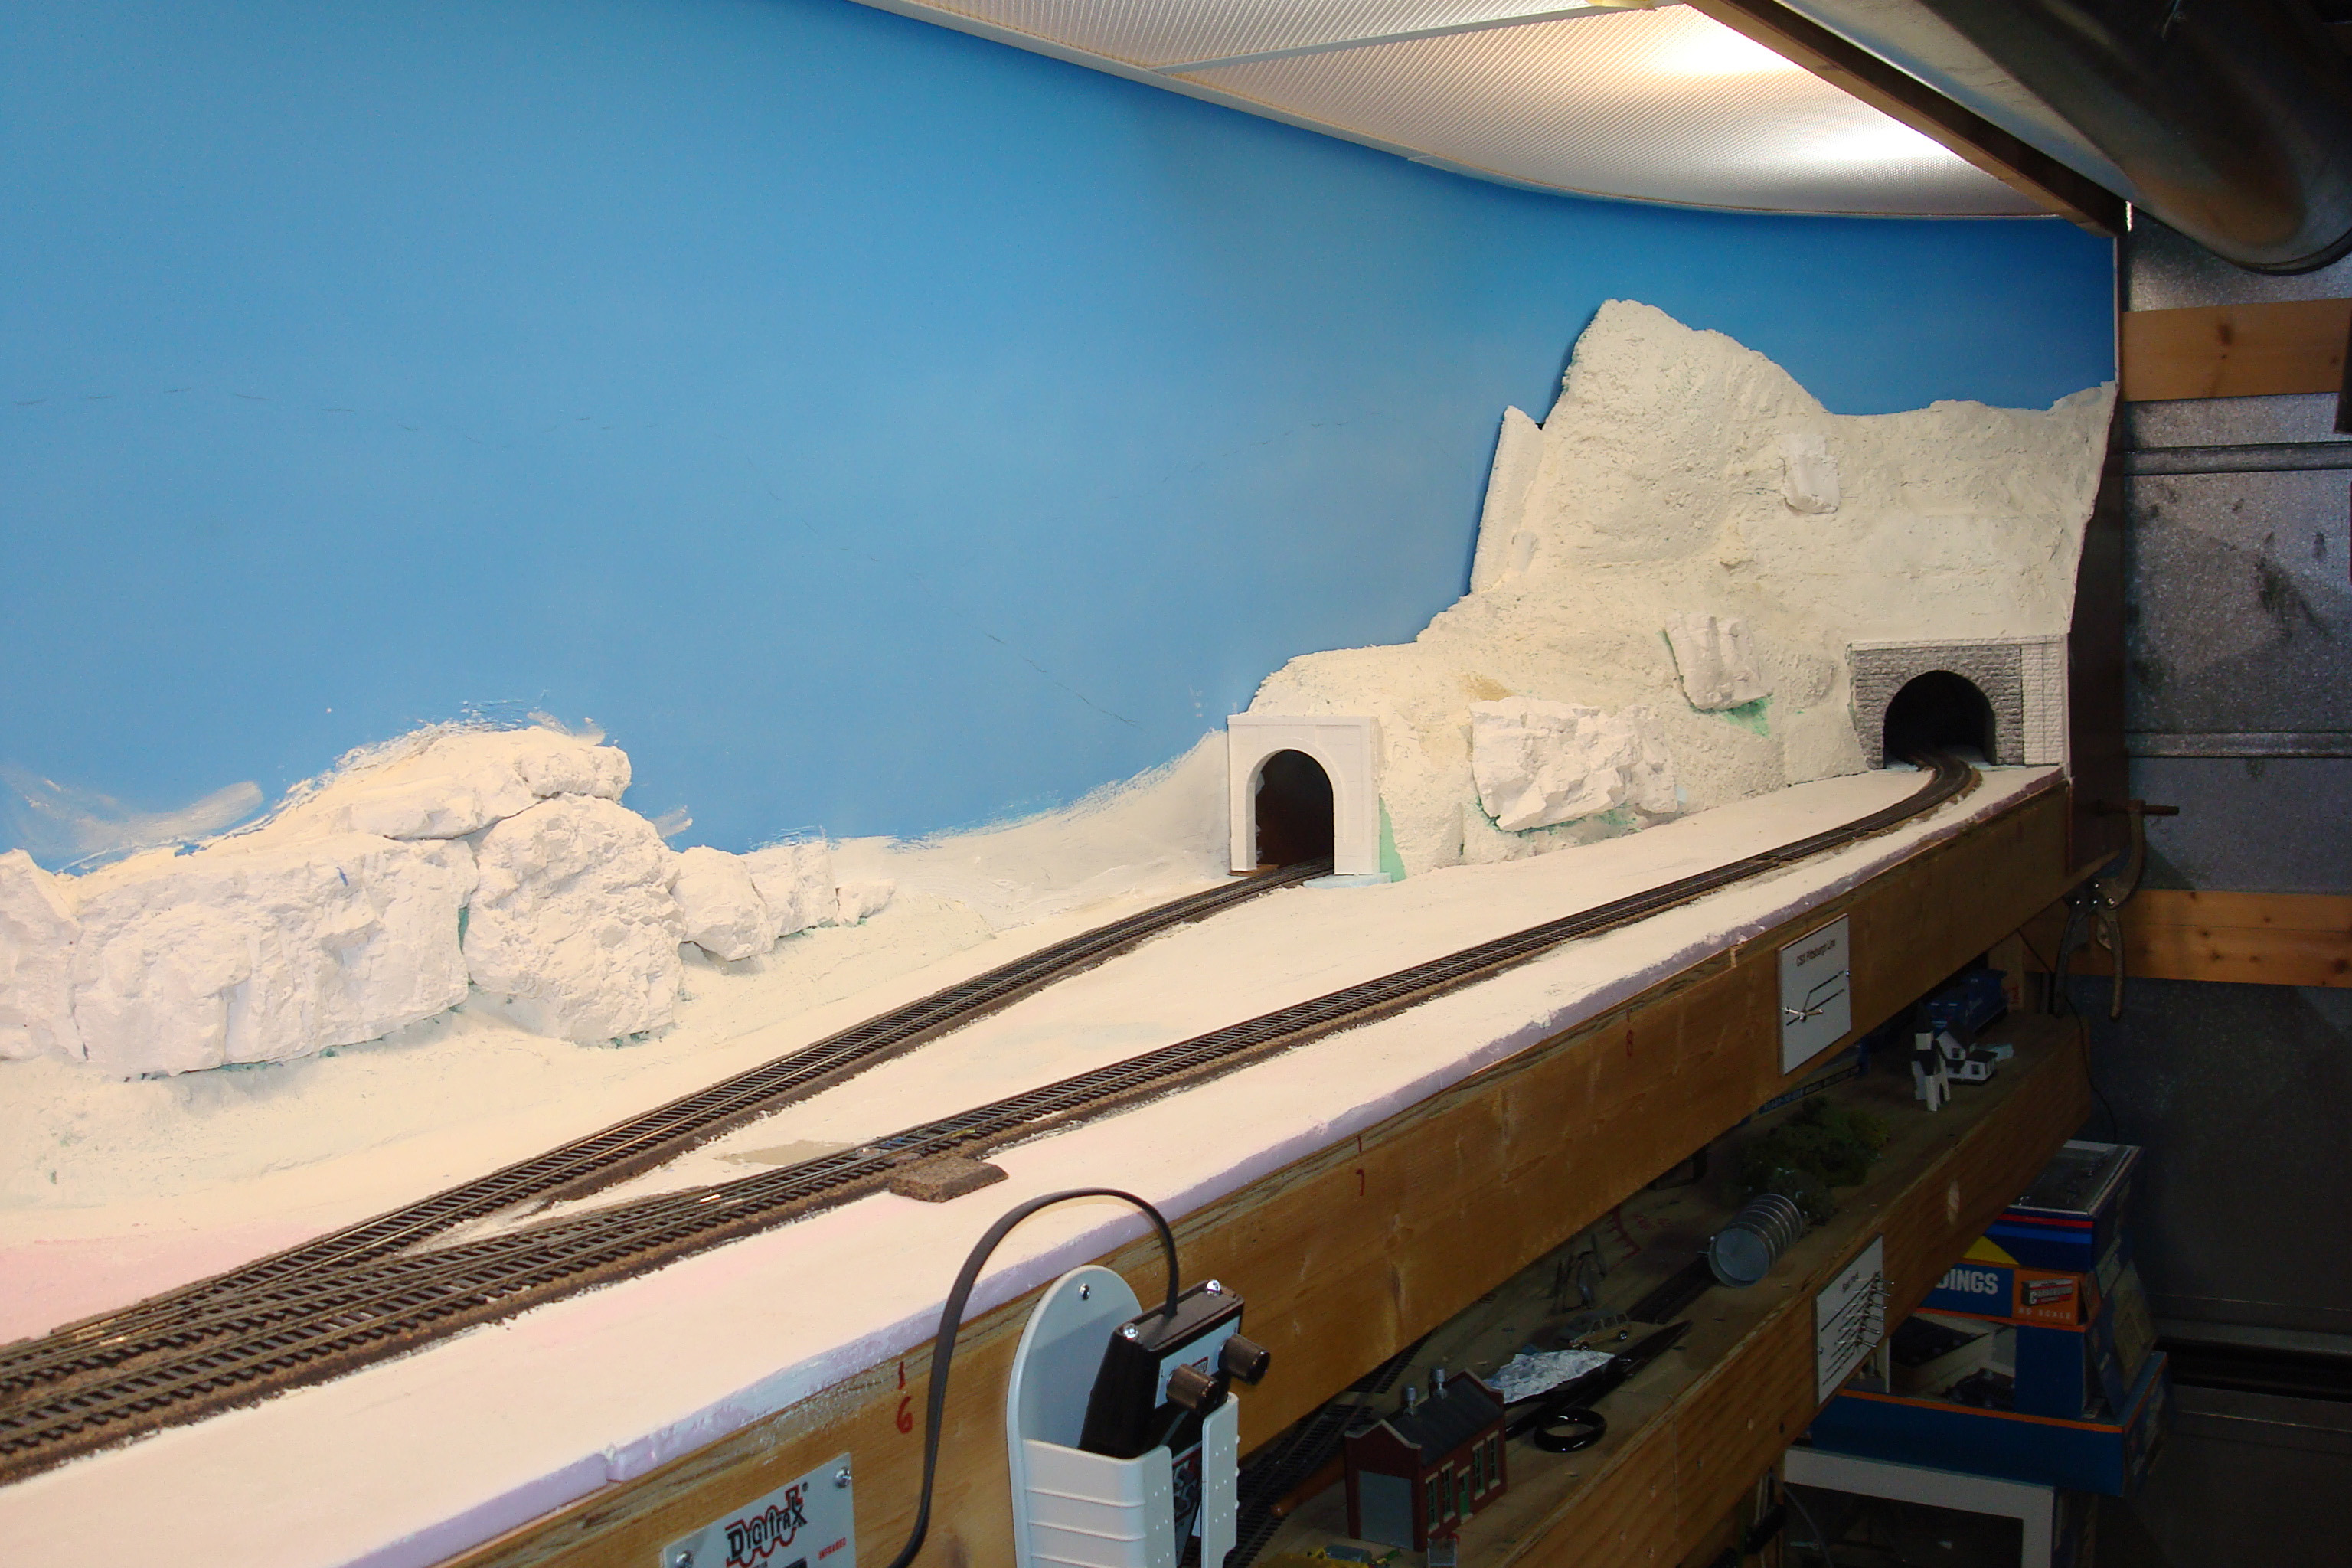
Land Forms and Lighting
Blue foam has now been carved and coated with plaster. Rock castings are added next, attached with Liquid Nails. Mountain is removable for access to hidden track. Also shown in this picture is the Lighting valance, I used dropped ceiling components and "Cracked Ice" light diffusers. Home Depot ECO Smart bulbs are used for lighting. 60W equivalent, alternating between Bright White (3500K) and Daylight (5000k) every 12". This gave me a pleasing natural color.
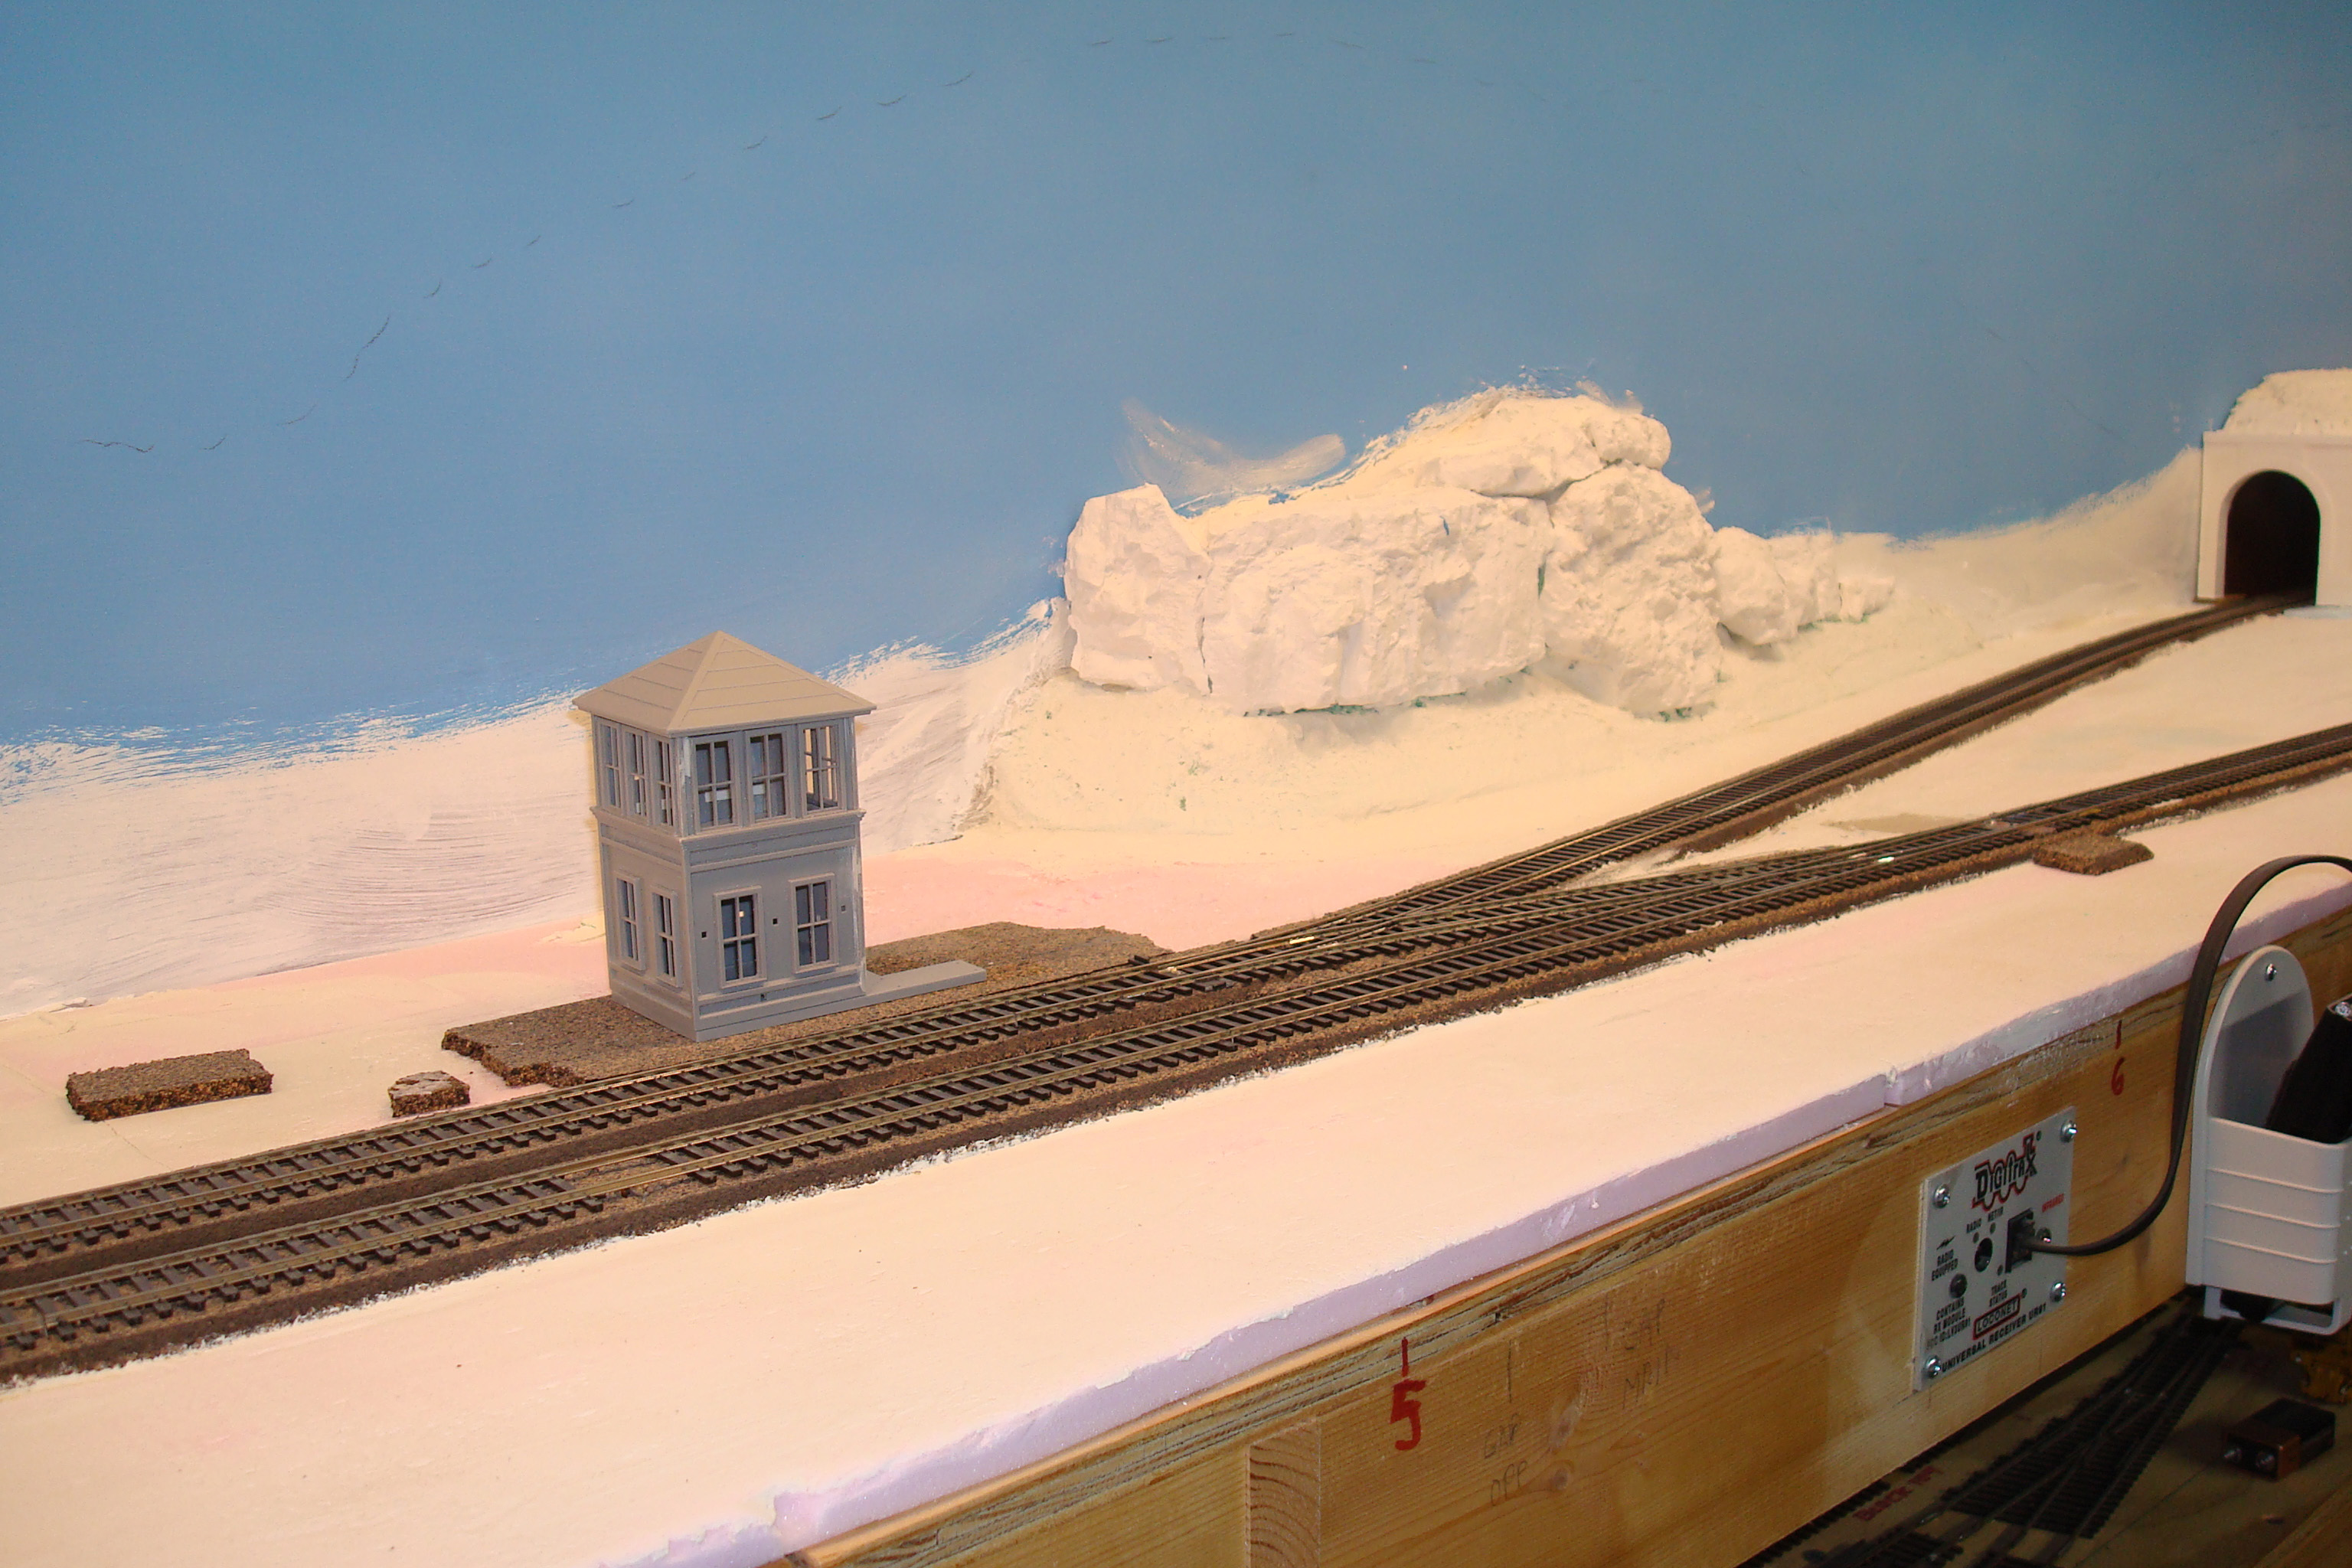
More Land Forms
Closer look at rock castings with placement of tower. Rocks are cast using rubber molds and Plaster of Paris.
This Web site was designed by RLC.